Setting up OAuth Using Keycloak
ENTERPRISE This is an EJBCA Enterprise feature.
The following describes how to set up Keycloak locally to test OAuth functionality in EJBCA.
A getting started with Keycloak on Docker guide is provided by Keycloak, see Keycloak documentation Keycloak on Docker.
This page includes sample values for setting up Keycloak on a local machine - replace values as required for your environment.
Step 1 - Start and Log in to Keycloak
From a terminal start Keycloak with the following command:
docker run -p 8084:8080 -e KEYCLOAK_USER=admin -e KEYCLOAK_PASSWORD=admin quay.io/keycloak/keycloak:11.0.2Port 8080 is used by the EJBCA Public Web, and Keycloak is started exposed to port 8084. The command also creates an initial admin user with username admin and password admin. Again, you are only setting up a sandbox test environment and should not perform this in production.
Go to the Keycloak Admin Console on http://localhost:8084/auth/admin and log in with the username and password created.
Step 2 - Create Realm and Client
A realm in Keycloak is the equivalent of a tenant and allows creating isolated groups of applications and users. By default, there is a single realm in Keycloak called master. This is dedicated to manage Keycloak and should not be used for your own applications.
To create a realm and client:
Open the Keycloak Admin Console, hover over the Master list and click Add realm.
Specify Name=myrealm and click Create.
Go to Realm Settings>Keys and copy the Kid value for the RSA key (that will be used when configuring Trusted OAuth Providers in EJBCA in a later step) and download the public key.
Alternatively, check http://localhost:8084/auth/realms/myrealm/)In the Keycloak Admin Console, click Clients to create a new client and specify the following:
Client ID: ejbcaAdminWeb
Client Protocol: openid-connect
Root URL: https://localhost:8442/ejbca/adminweb/

Set Valid Redirect URIs to https://localhost:8442/ejbca/adminweb*

To configure Audience to be sent with token, select the Mappers tab under Client view, and click Create.
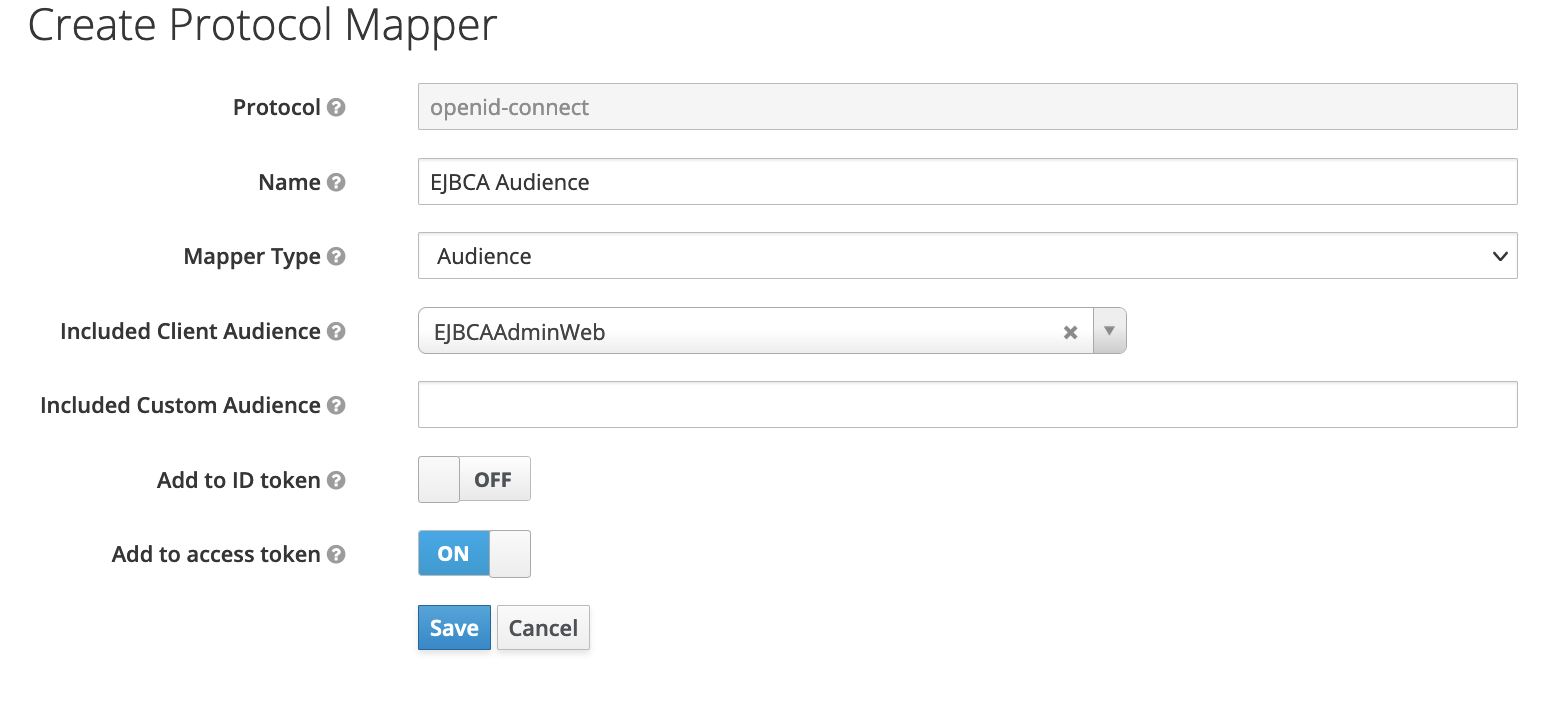
You can define Client Audience or a custom value. This value should be added to EJBCA trusted providers configurations.
Step 3 - Add OAuth Provider in EJBCA
Next, configure OAuth Providers in the EJBCA System Configuration:
In EJBCA, go to System Configuration>Trusted OAuth Providers.
Click Add to create an OAuth Provider and specify the following:
Select the OAuth Provider Type=Keycloak.
OAuth Provider Name: Specify a unique label for the provider.
URL: Set the base login URL for the provider. For this local testing with Keycloak, use http://localhost:8084/auth.
Realm Name: Specify the name selected previously when creating the realm.
Audience: a value of aud claim in token configured with mappers in Keycloak.
Client Name: Specify the Client ID selected previously when creating the realm.
OAuth Key Identifier: Add an OAuth Key Identifier using the Kid value copied earlier.
Upload Public Key: Upload the downloaded Public Key file as Current Public Key and click Upload Public Key to add the key to the provider.
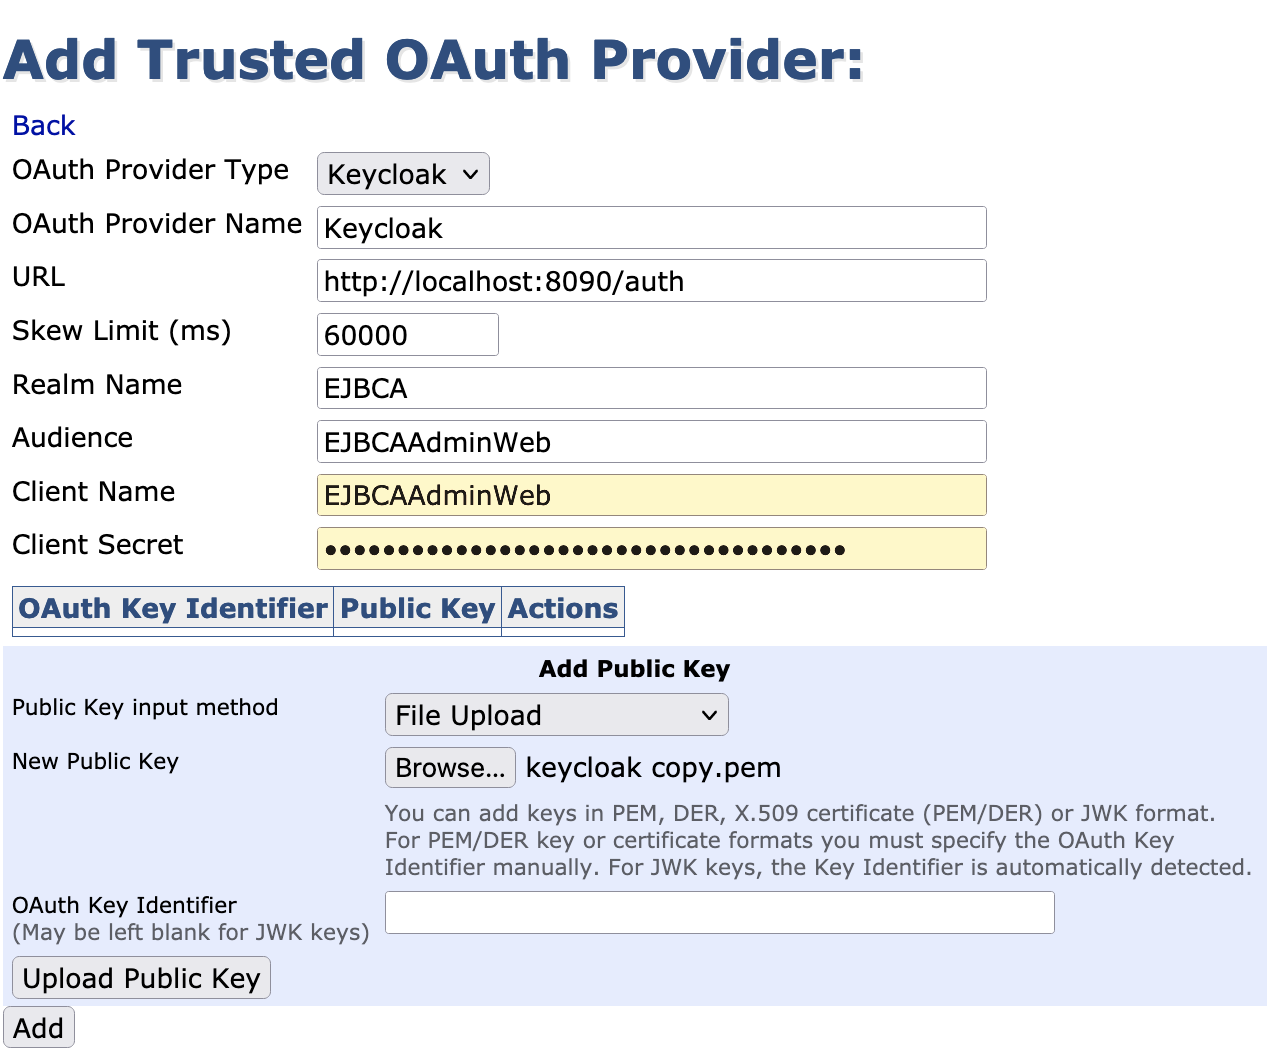
Click Add to create the OAuth Provider.
Step 4 - Create User in Realm
To create a user in the realm:
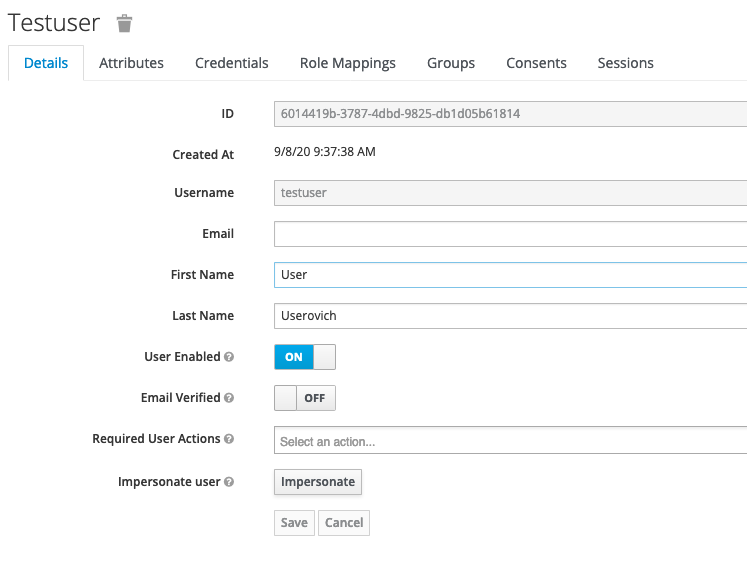
In the Keycloak Admin Console, click Users>Add User.
Specify a Username, First Name, and Last Name, and then click Save.
To set an initial password for the user, click the Credentials tab.
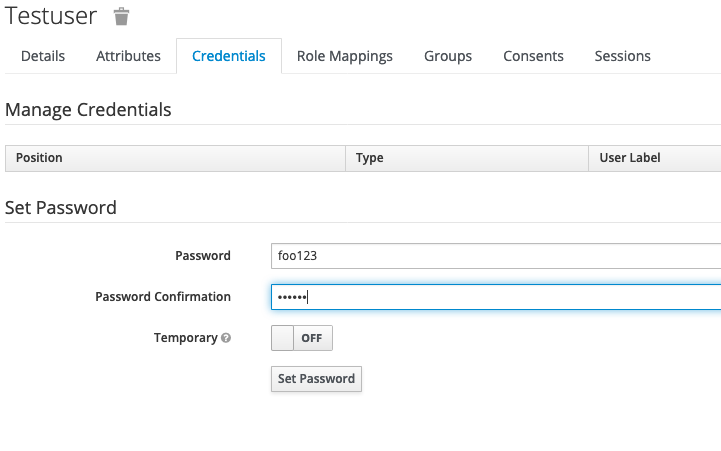
Specify a password and click Set Password.
Step 5 - Add User in EJBCA
To add this user to the EJBCA role members list.
In EJBCA, under System Functions, click Role.
On the Admin role, click Members and specify one of the following:
Subject ("sub") claim: As Match Value, use the generated user id (6014419b-3787-4dbd-9825-db1d05b61814).
-OR-
Issuer ("iss") claim: As Match Value, use http://localhost:8084/auth/realms/myrealm.
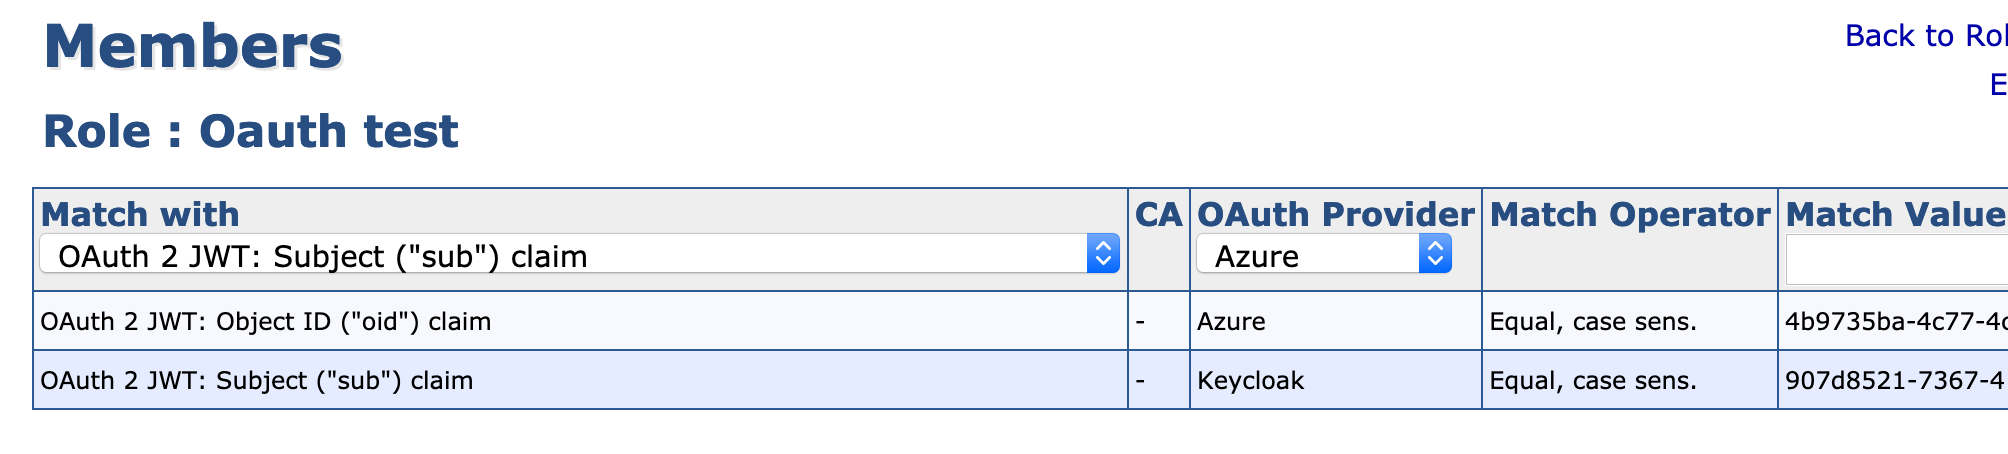
Select OAuth provider.
Optionally, update the access rules for the user.
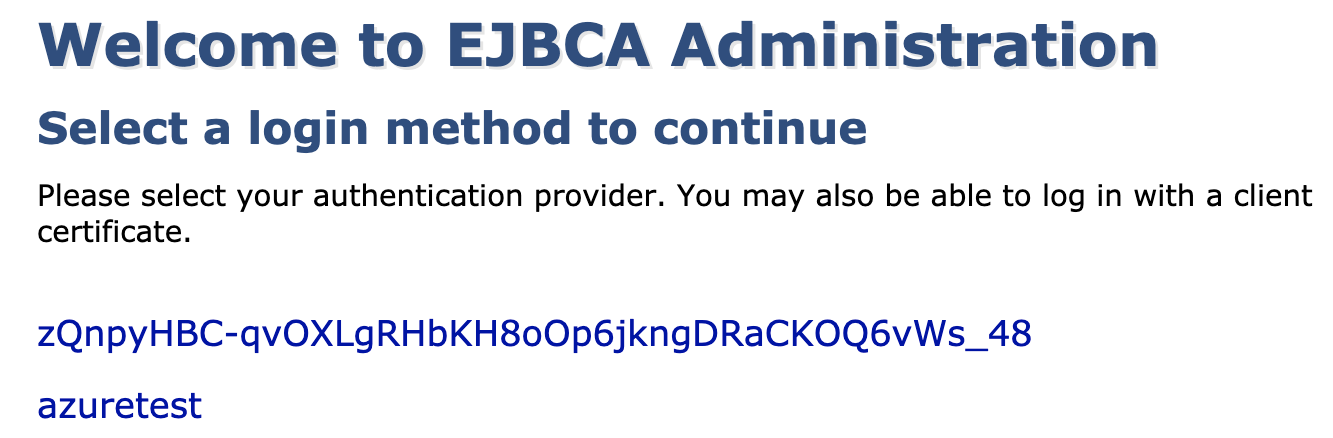
Step 6 - Log in to EJBCA
Next, to log in using EJBCA, go to https://localhost:8442/ejbca/adminweb/
You are redirected to the EJBCA login page, listing configured OAuth Providers.
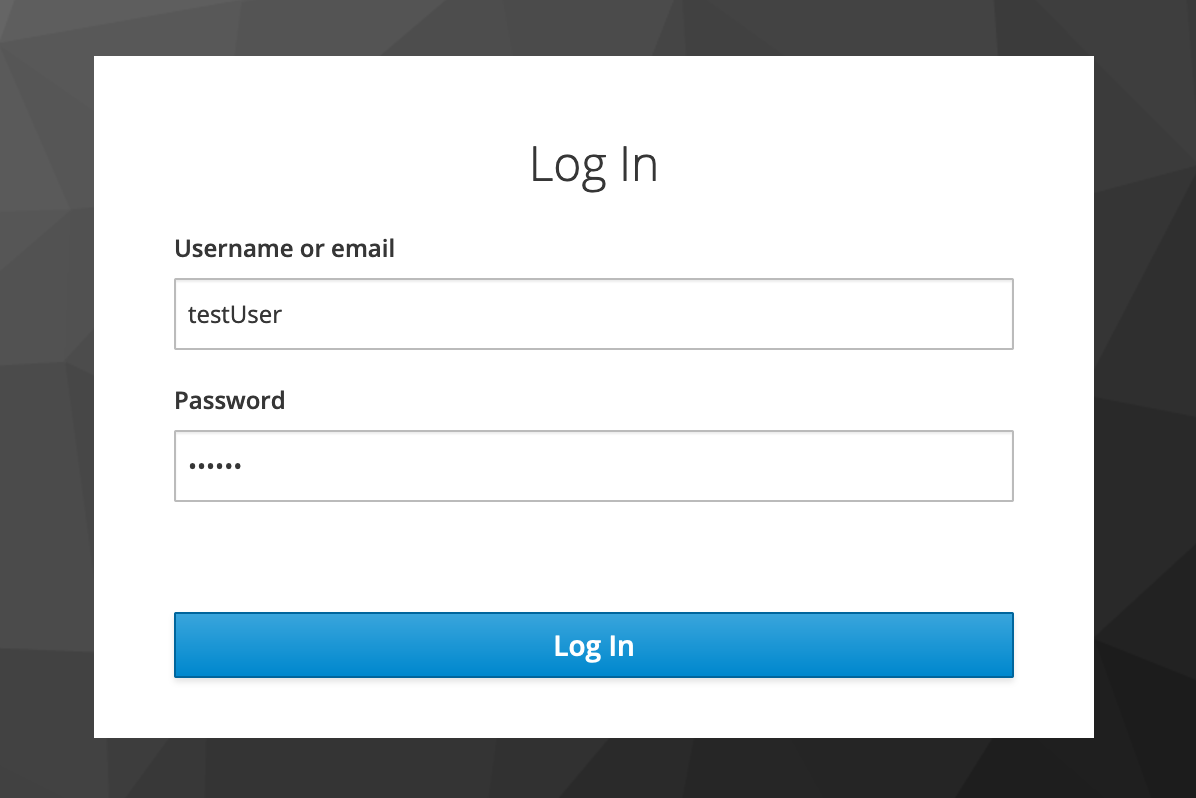
Click the name of your Keycloak OAuth provider to be redirected to the Keycloak login page.
Enter the username and password and click Log In to be redirected to EJBCA.
Additional Notes
HTTPS can be configured on Keycloak however if the Keycloak server certificate that chains up to an root not trusted by Java you need to manually add it to Java's truststore.
Add a CA to the Java truststore in CentOS / RHEL
keytool -importcert -noprompt -trustcacerts -alias root -file Root.pem -keystore /etc/pki/java/cacerts -storepass changeit