Setting up OAuth Using Azure Active Directory
ENTERPRISE This is an EJBCA Enterprise feature.
The following describes how to set up Azure Active Directory to test OAuth functionality in EJBCA.
Step 1 - Setting up Azure Active Directory
To register EJBCA as a new application using the Azure portal, do the following:
Log in to the Azure portal on https://portal.azure.com.
In the left-hand navigation pane, select the Azure Active Directory service, and then select App registrations > New registration.
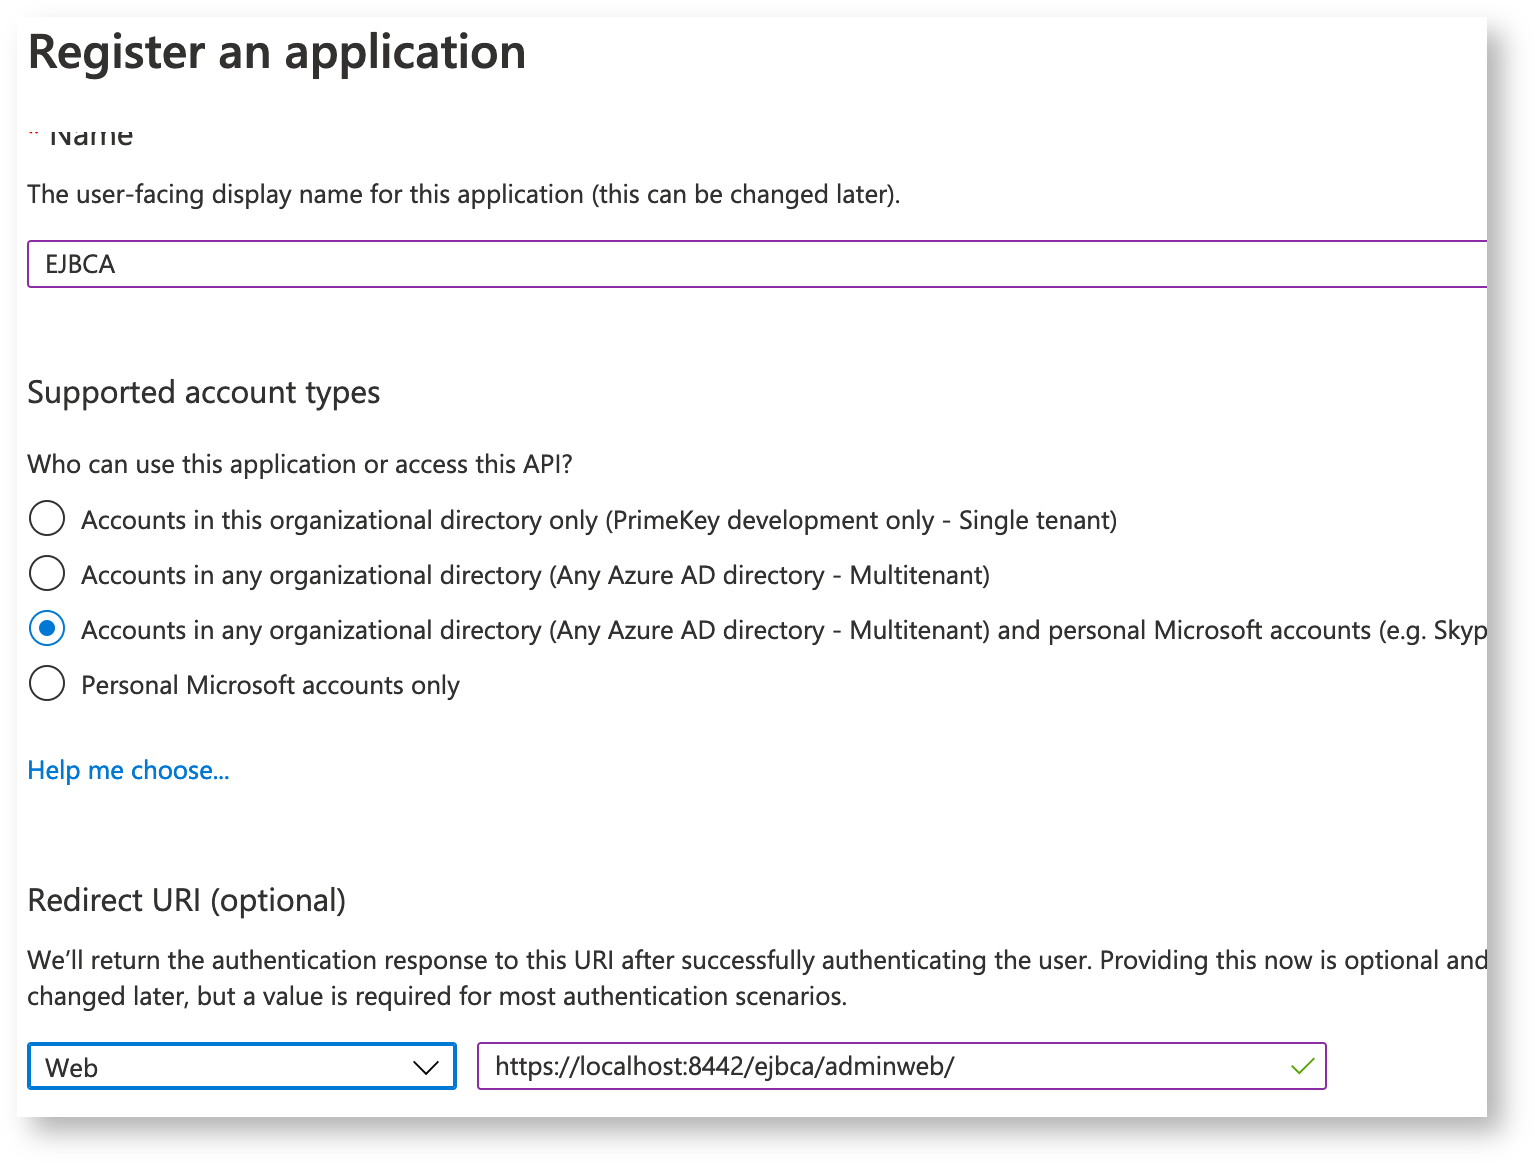
On the Register an application page, specify registration information according to the following and then click Register.
Name: Specify an application name.
Supported account types: Select accounts to support.
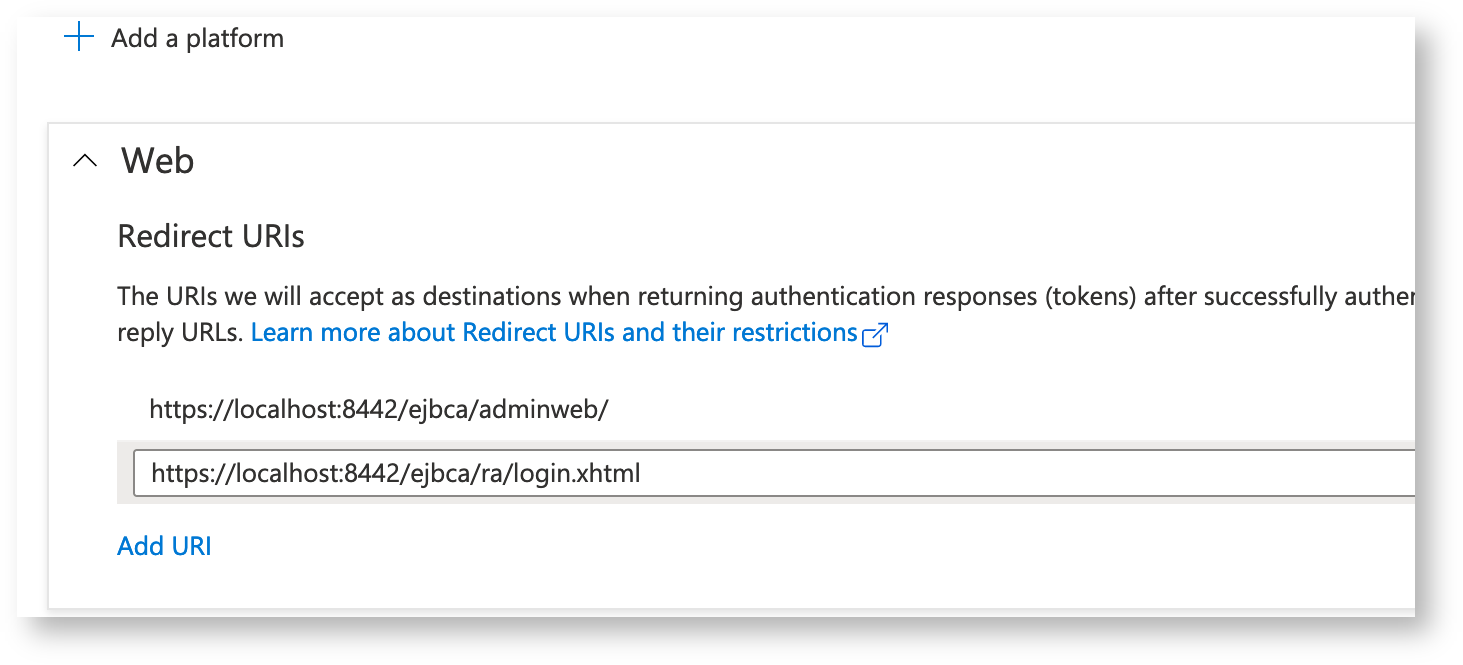
Redirect URI (optional): Select Web and specify the redirect URI.
Redirect URIs: Configure redirect URIs and note that Query parameters and Wildcards are not allowed in redirect URIs and ll redirect URIs should be configured in Azure.
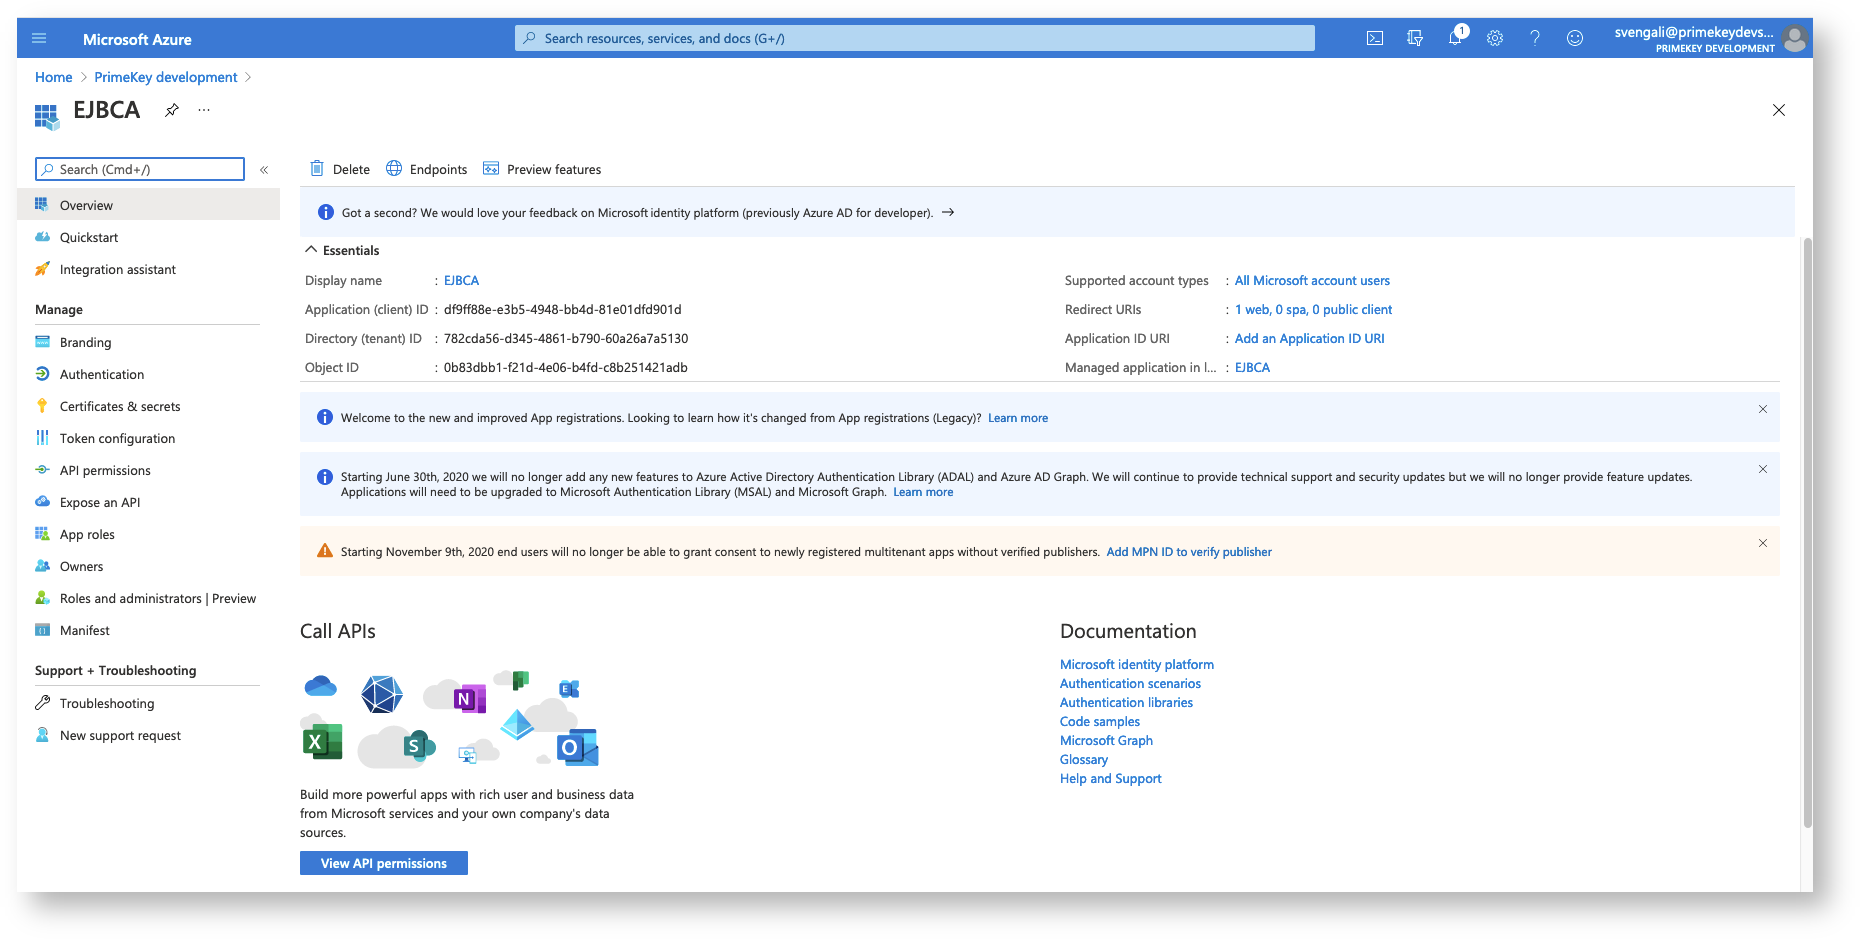
Azure AD assigns a unique application (client) ID to EJBCA and the Azure portal displays an EJBCA Overview page.
Step 2 - Setting up EJBCA
OAuth Providers are configured on the EJBCA System Configuration Trusted OAuth Providers tab (System Configuration → Trusted OAuth Providers).
To add the OAuth Provider in EJBCA and find the values for the different fields in the Azure portal, perform the steps below.
Adding the Provider
To configure an OAuth provider in EJBCA:
In EJBCA, go to System Configuration → Trusted Oauth Providers, and click Add.
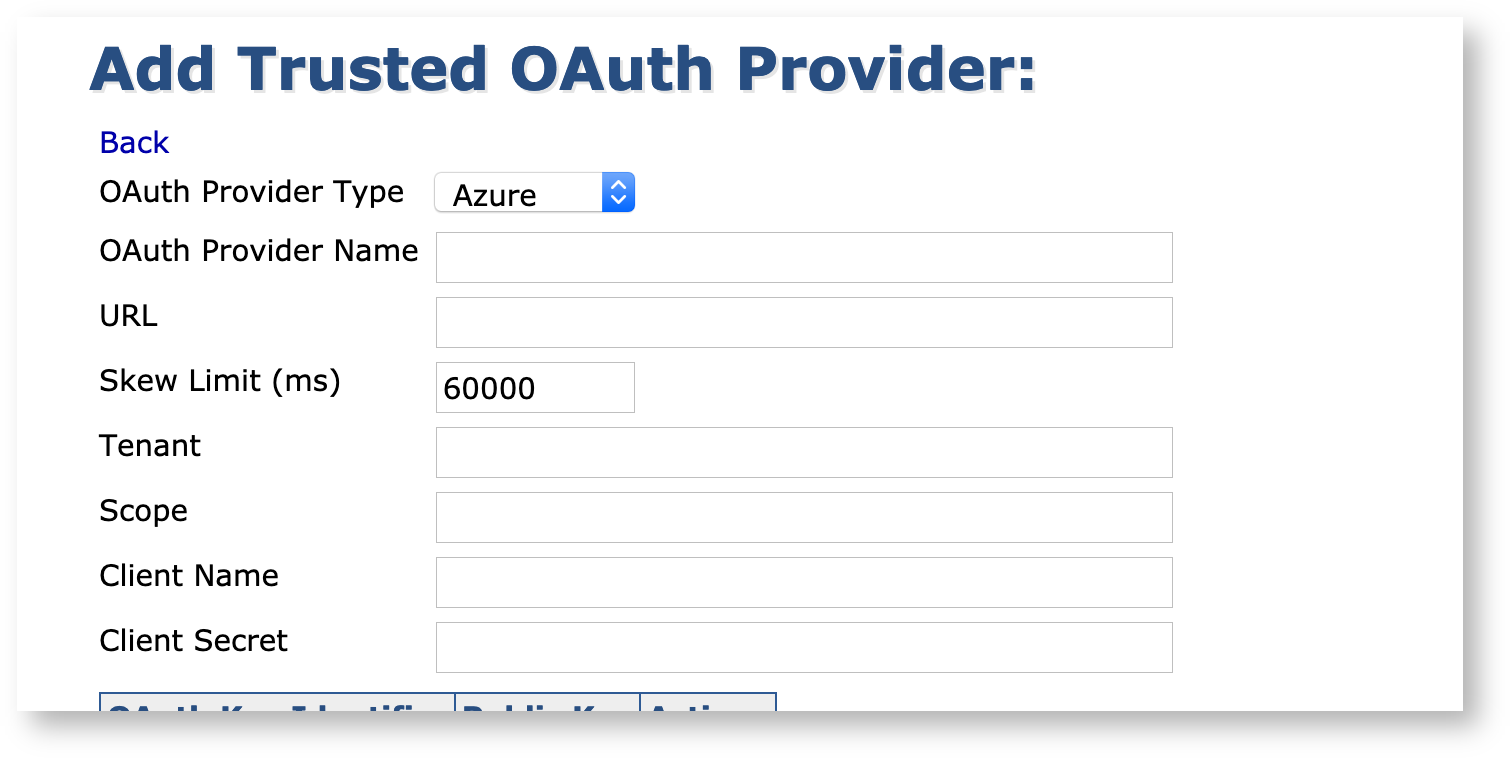
Specify the following and then click Save:
Select the OAuth Provider Type=Azure.
OAuth Provider Name: Specify a unique label for the provider.
Setting the URL
To find the base login URL for the provider in the Azure portal:
On the Azure portal EJBCA Overview page, click Endpoints.
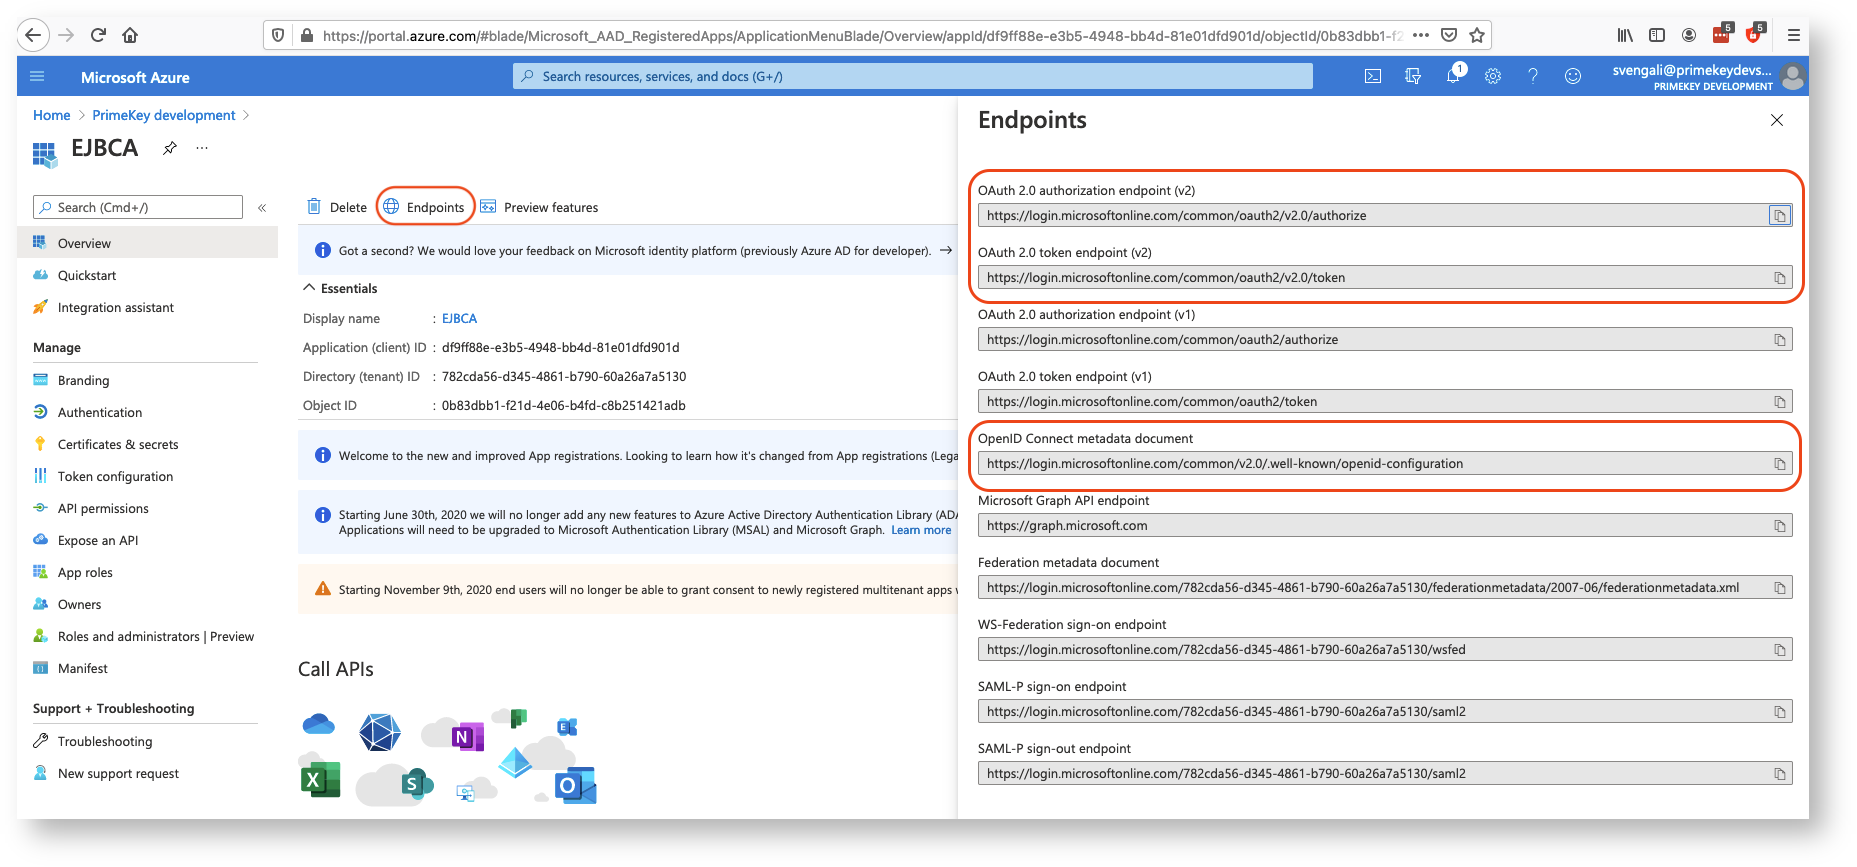
Available endpoints are listed to the right: the first one indicated below is used to redirect users for authorization, the second one to exchange received code to token, and the last one contains the OpenID configurations.
In EJBCA, set the following as base login URL: https://login.microsoftonline.com/
Setting the Tenant
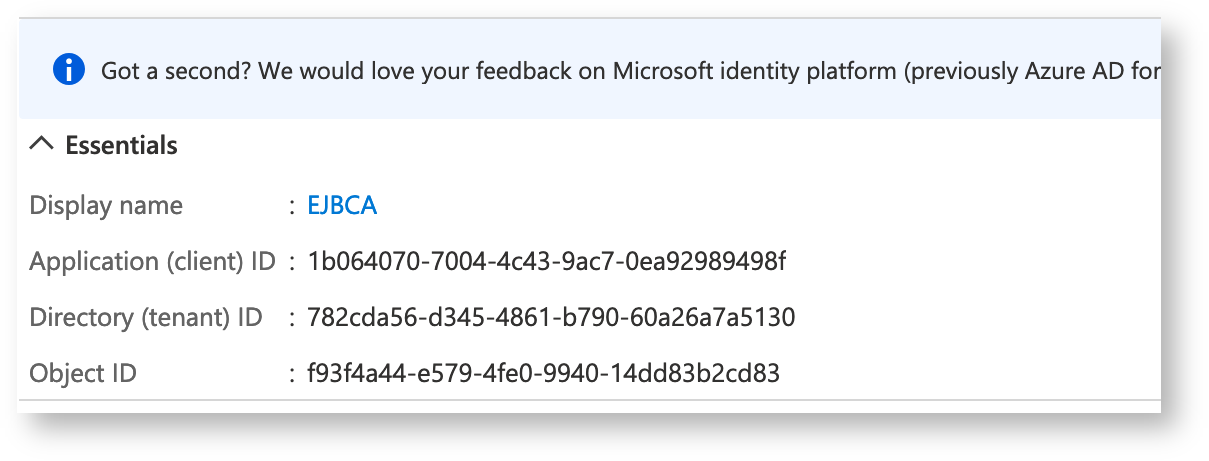
The Tenant value is displayed at the top of the Azure portal EJBCA Overview page under Essentials.
Setting the Scope
Azure returns a JWT access token which cannot be validated because Azure adds a nonce claim in the header of the token after the token has been signed using the public key. For details, refer to this external article on Making Azure AD OIDC Compliant.
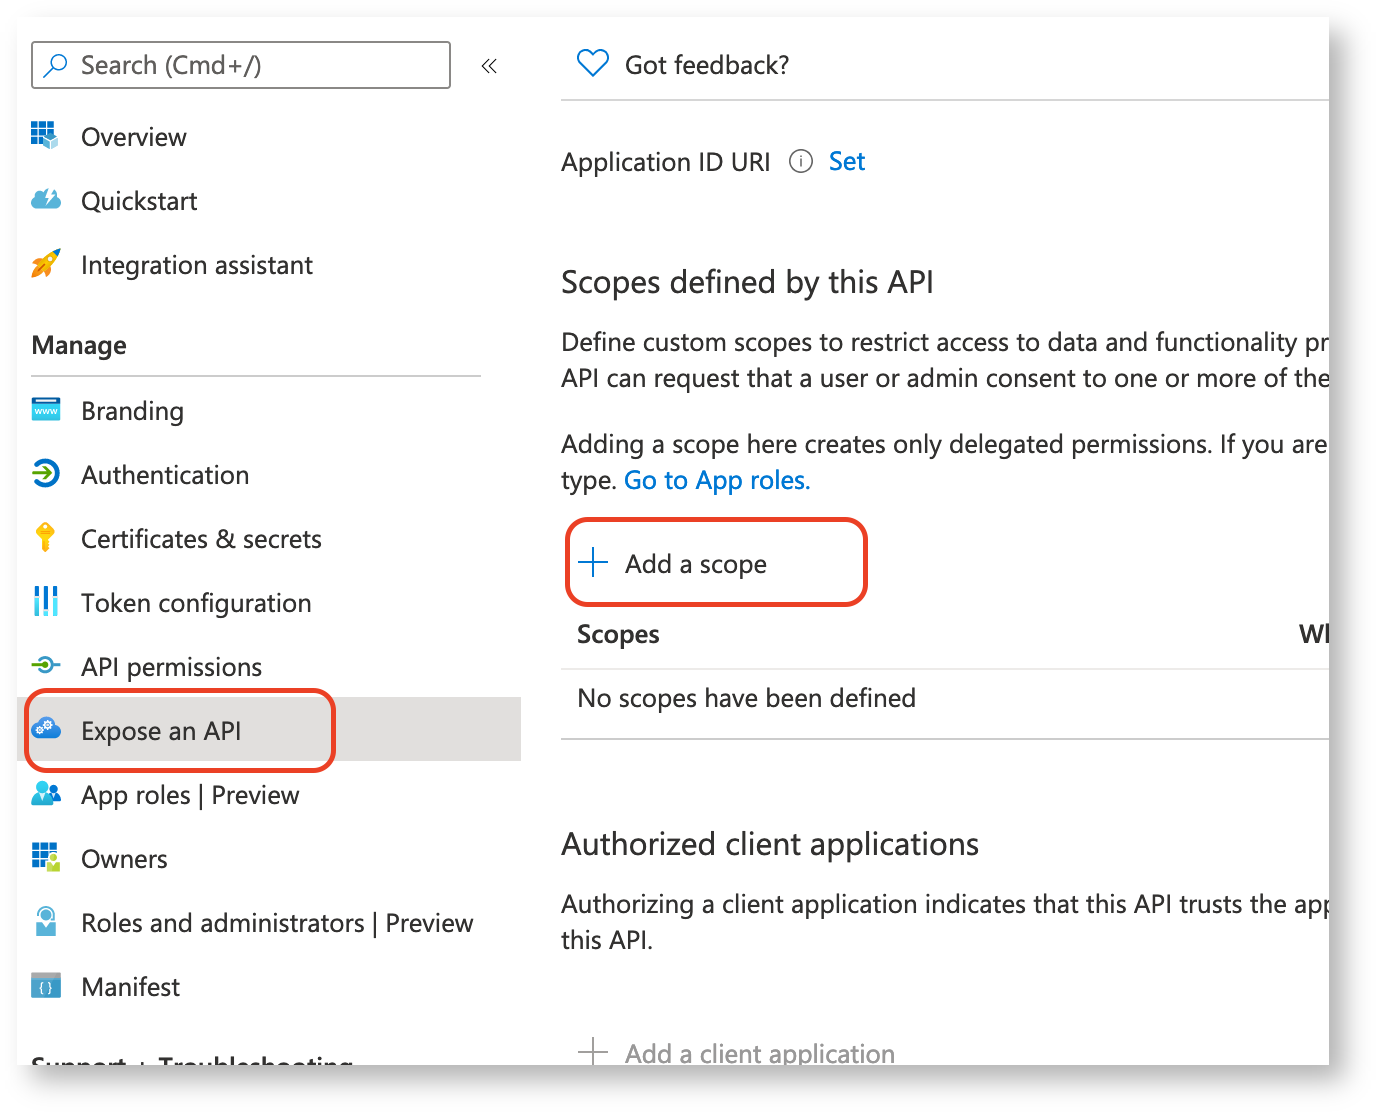
To solve the issue, specify a custom scope in the Azure portal:
In the left-hand navigation pane, select Expose an API, and then click Add a scope.
Under Add a scope, specify the following and click Add scope.
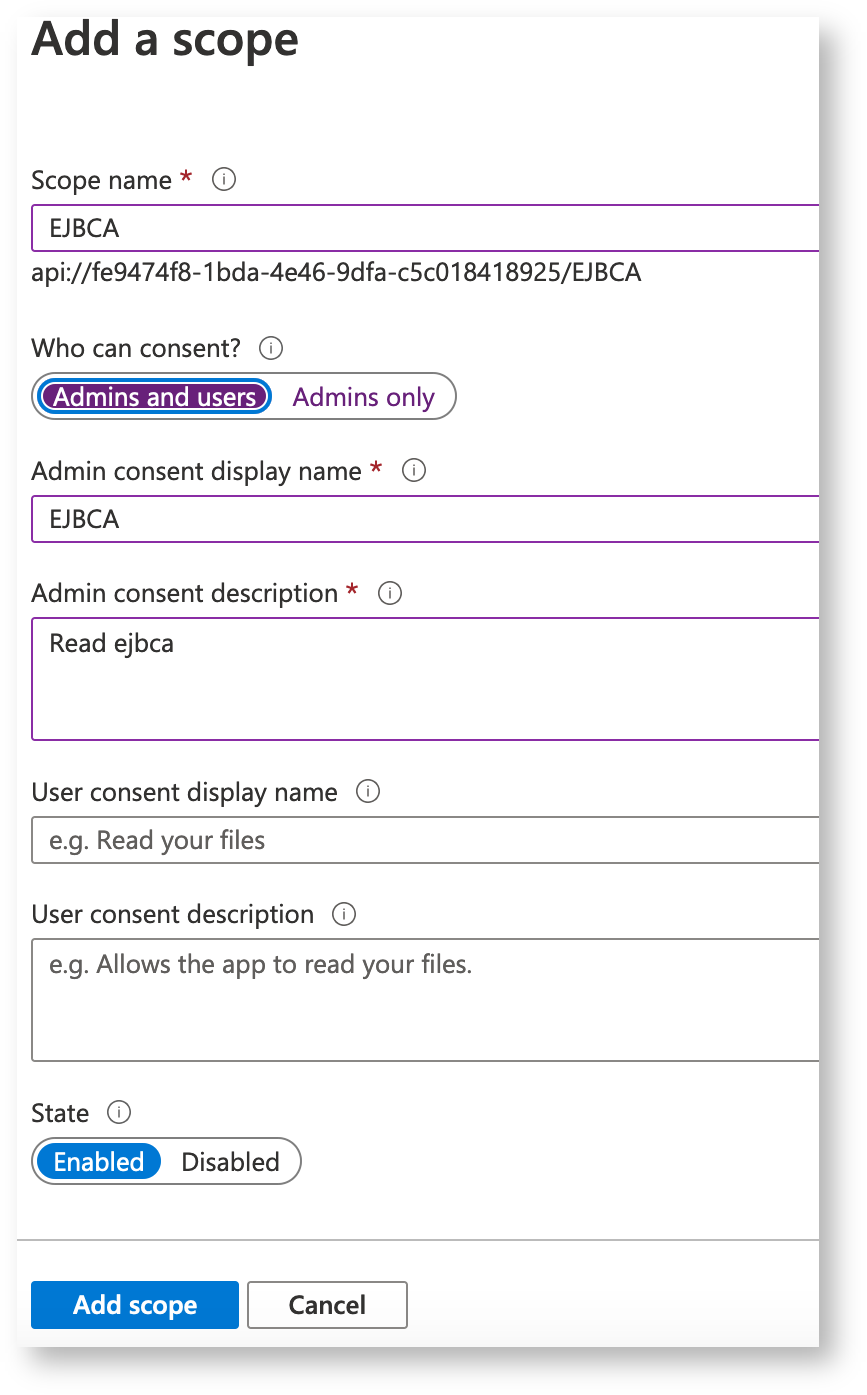
This shows that the Scope is api://fe9474f8-1bda-4e46-9dfa-c5c018418925/EJBCA
This also is where the Audience claim value can be found. The exposed API name (here, api://fe9474f8-1bda-4e46-9dfa-c5c018418925) will be the value set in the aud claim sent by Azure AD to EJBCA, and this value should be set in the Audience field in the Azure OAuth provider configuration.
Setting the Client
The Client value is the Application (client) ID displayed at the top of the Azure portal EJBCA Overview page under Essentials.
Setting the Client Secret
Token requests require either a client_secret parameter or to be signed by an authorized private key (described below in Setting the Key Binding). To generate a client secret in the Azure portal:
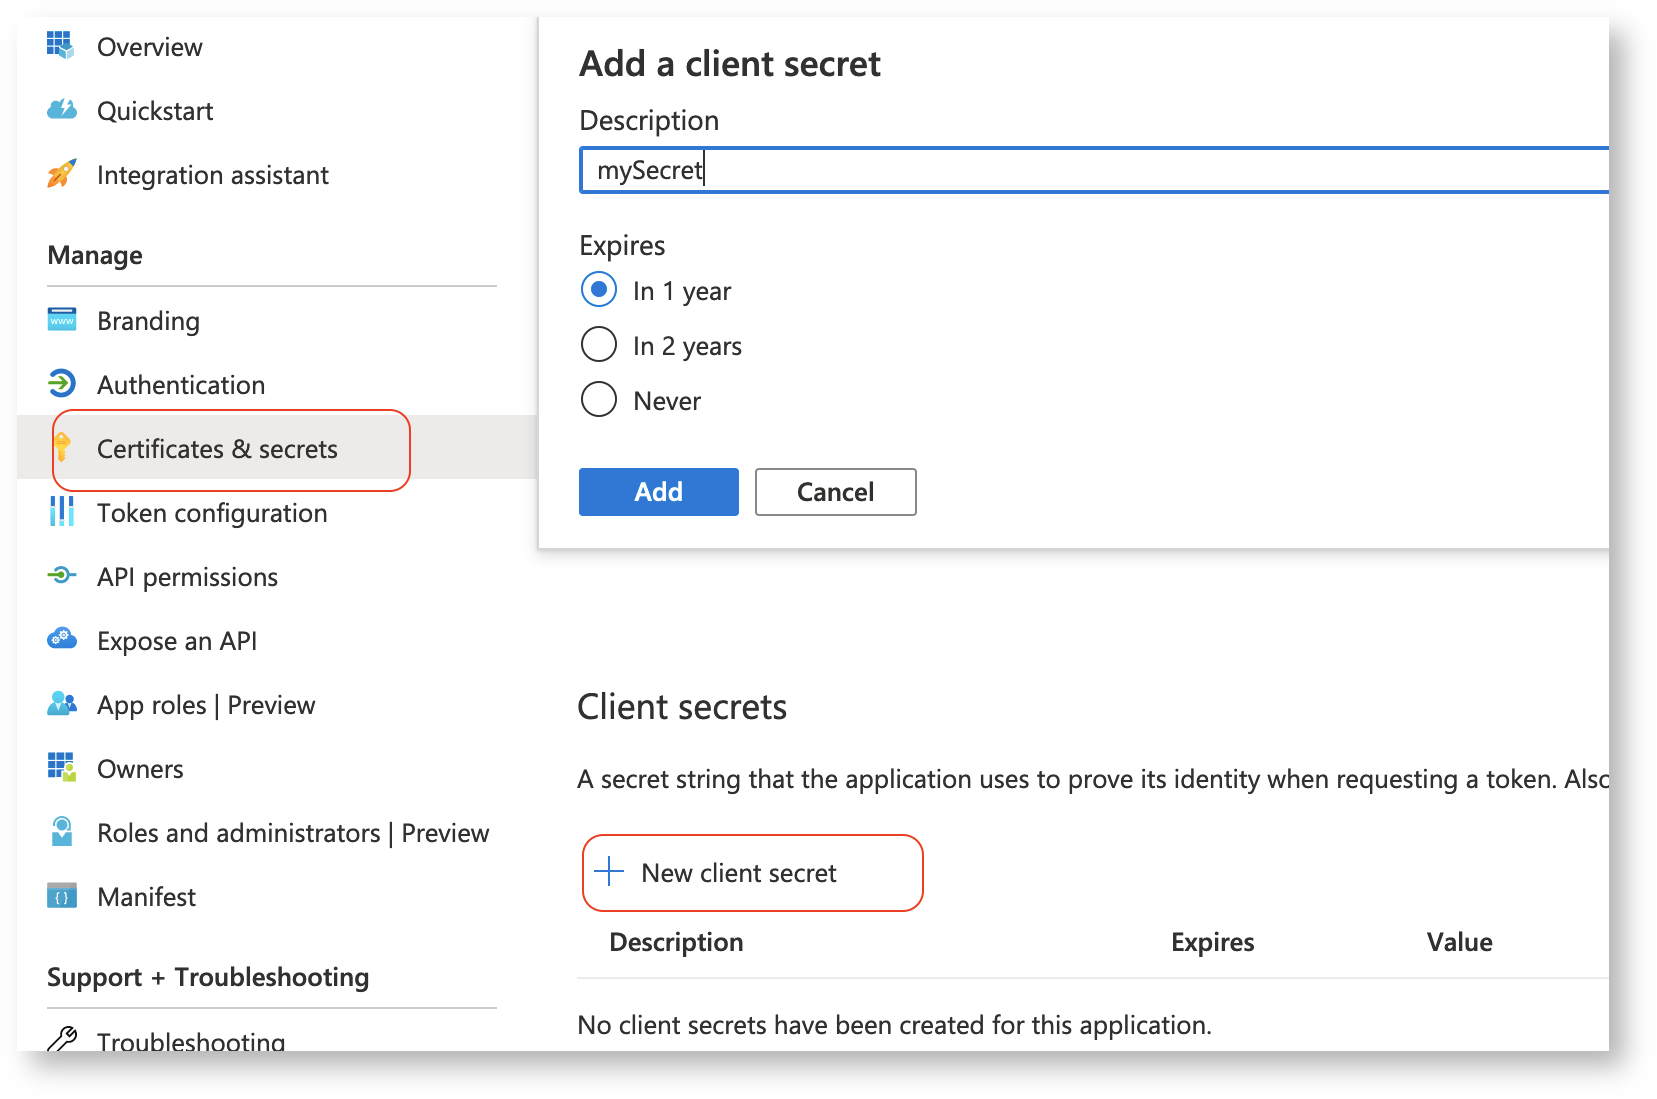
Go to Certificates & secrets in Azure and click New client secret.
Add a description for the client secret, and click Add.
Select < Use client secret > in Key Binding
Enter the value as Client Secret in EJBCA.
Setting the Key Binding
A more secure authentication option to Azure AD is to use key and certificate pair. To configure your Azure registration to use a key pair for authentication:
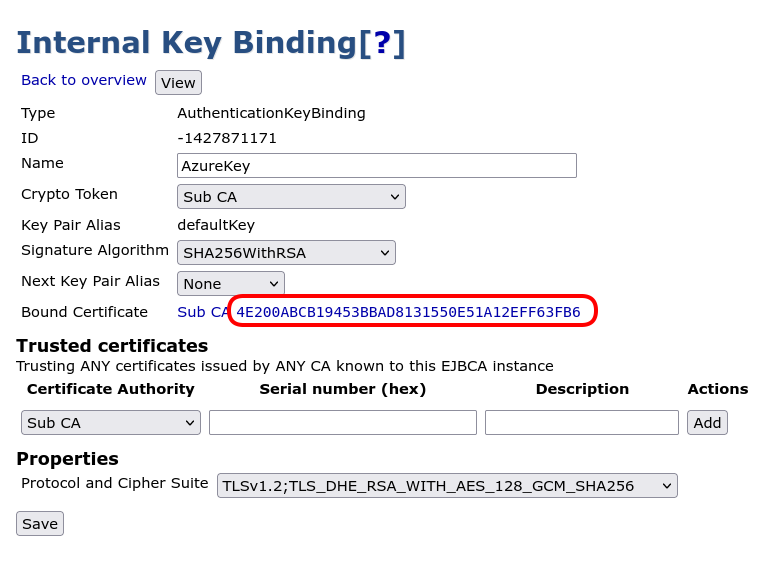
Create an AuthenticationKeyBinding internal key binding as described in Remote Authenticators Overview.
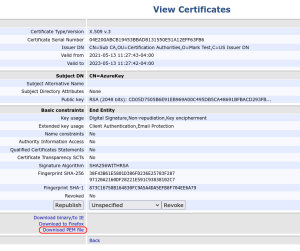
Select the binding you created in the Internal Key Bindings screen and click the link in the Bound Certificate field to view the associated certificate.
Select Download PEM file and save the certificate as a PEM file on the local file system.
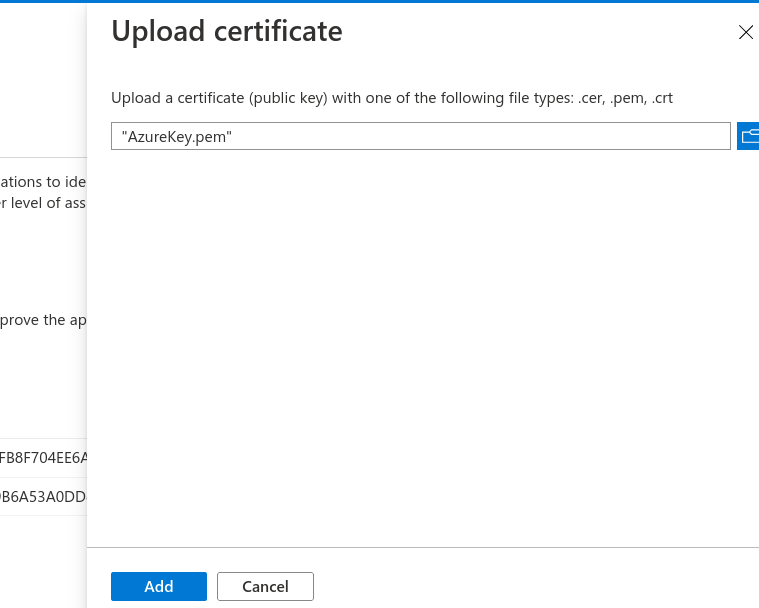
Go to Certificates & secrets in Azure and click Upload certificate. Select the PEM file downloaded above and click Add.
Select the key binding created above in the Key Binding in EJBCA.
Adding the Public Keys
To add the public keys:
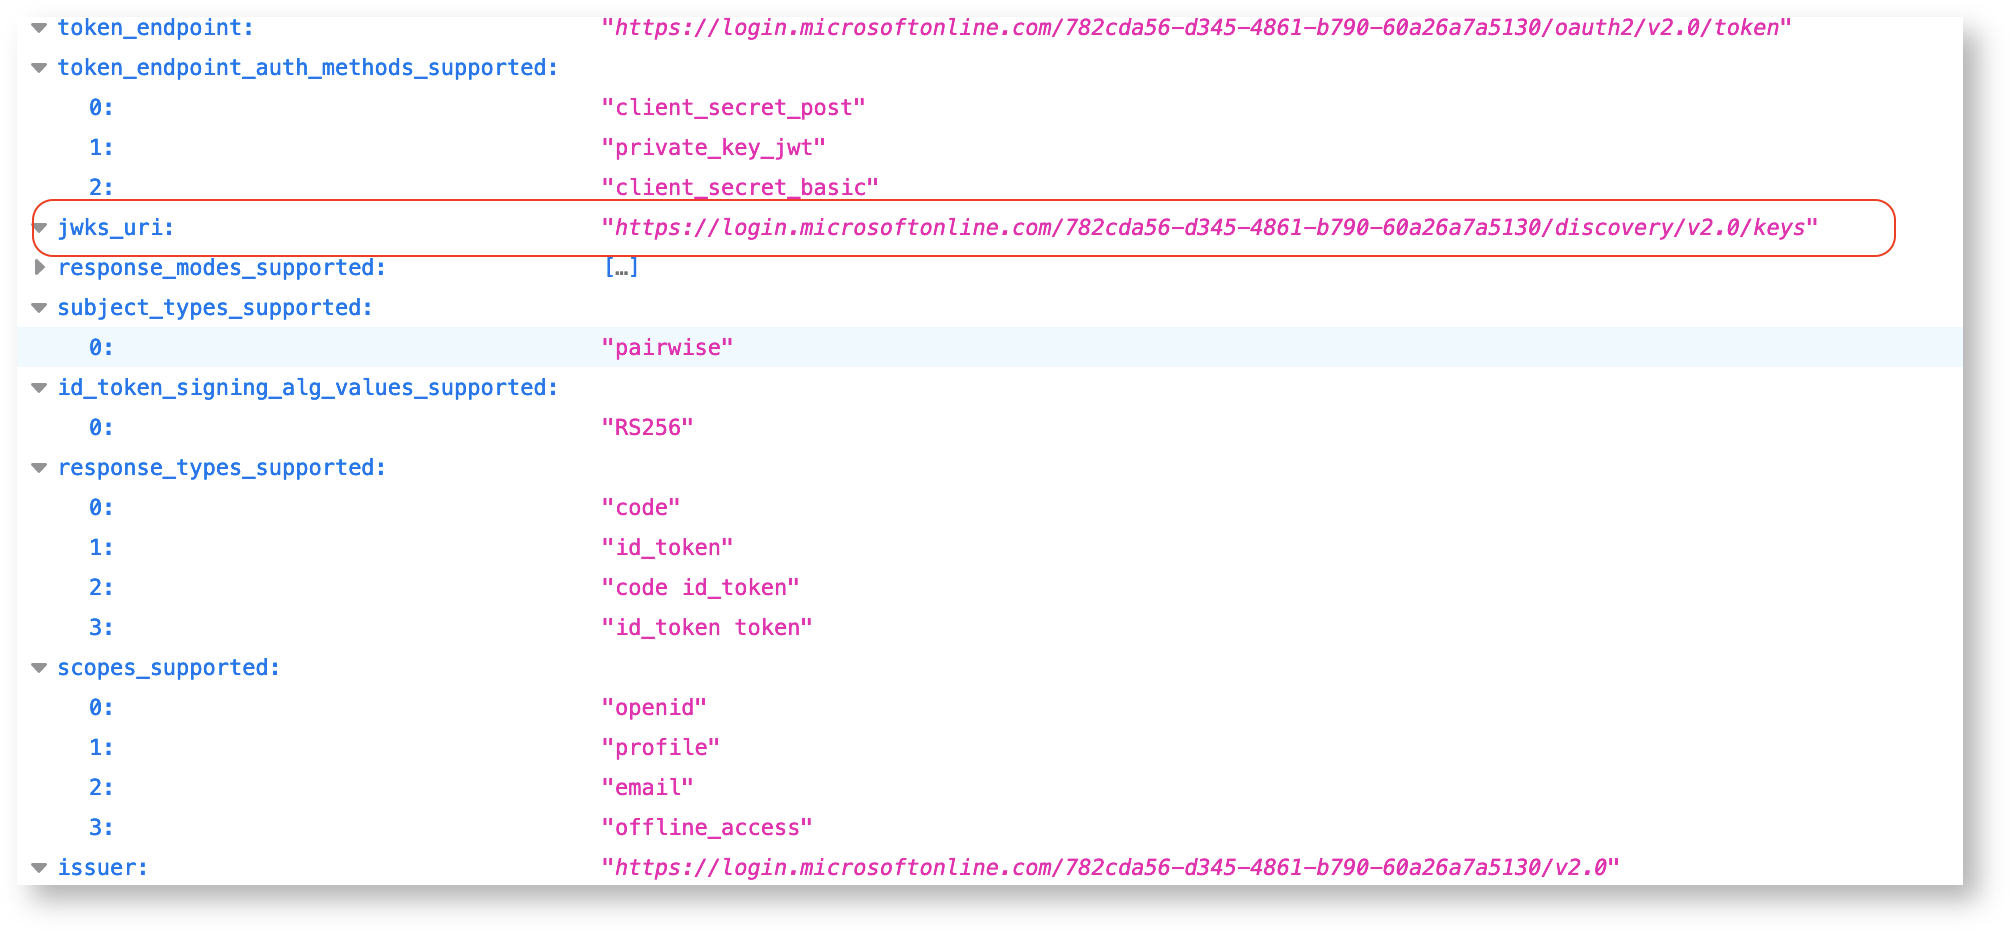
On the Azure portal EJBCA Overview page, click Endpoints and open the OpenID configuration.
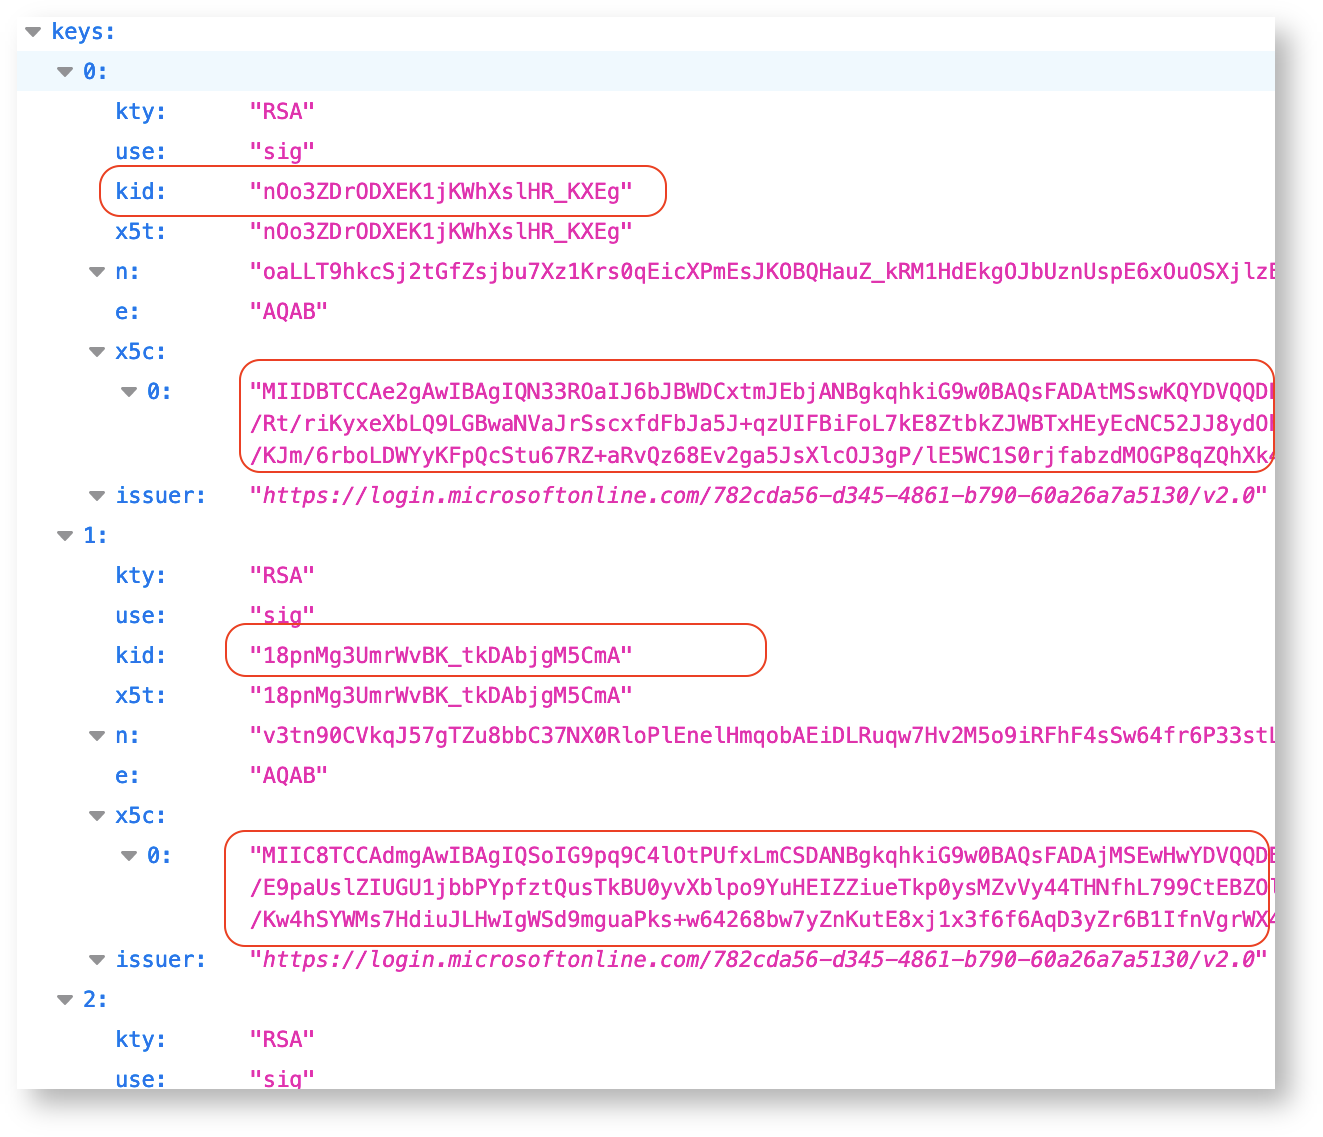
Open the URL denoted by jwk_uris.
The expanded view displays the kid value and certificates.
You can specify the public keys as a file, value, or URL.
As a file:
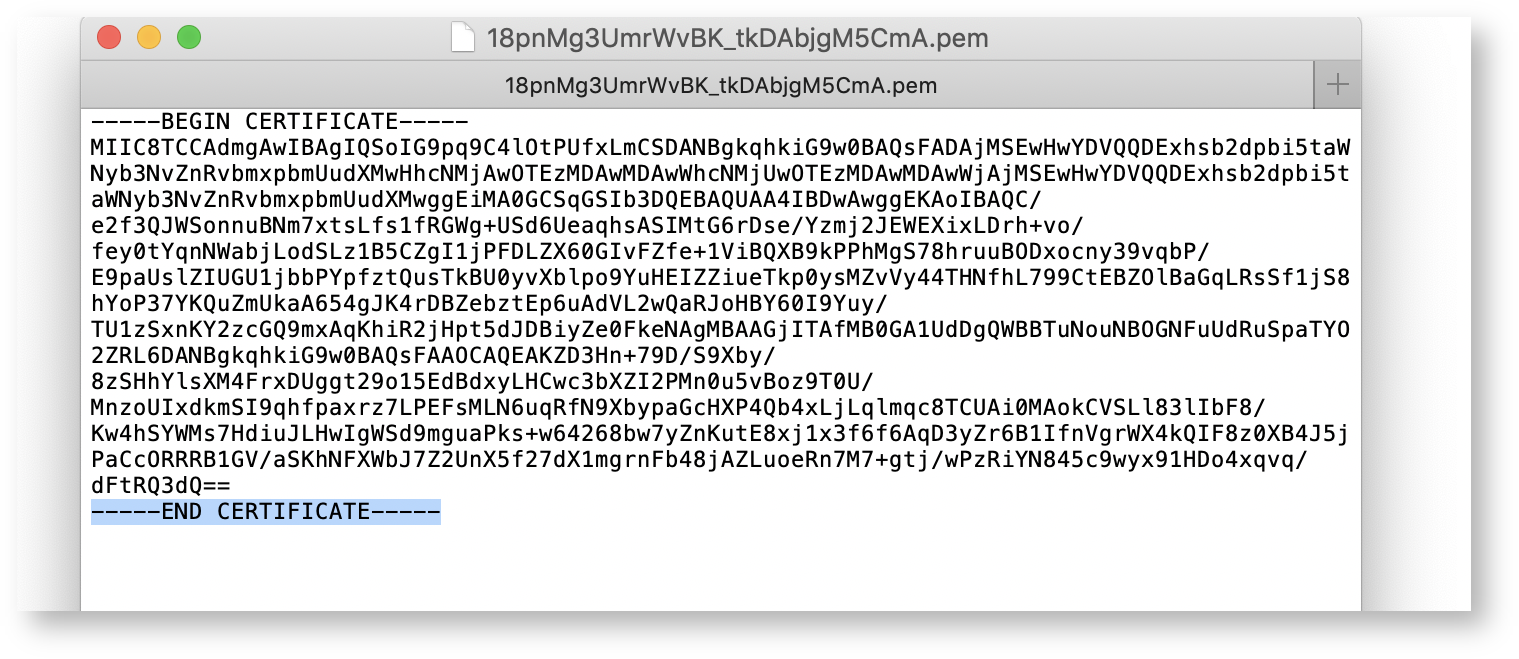
Copy the certificate value, copy it to text file, and prefix it with "-----BEGIN CERTIFICATE-----", suffix it with "-----END CERTIFICATE-----", and then save the file.
Input the key Identifier (kid) and upload the public key.
As a Text value:
Select Input Text Value as the Public Key input method.
Paste the certificate value into the text area, input the key Identifier (kid) and upload the public key.
As a URL:
Select Provide key config URL as the Public Key input method.
Paste the key_uri and click Upload Public Key.
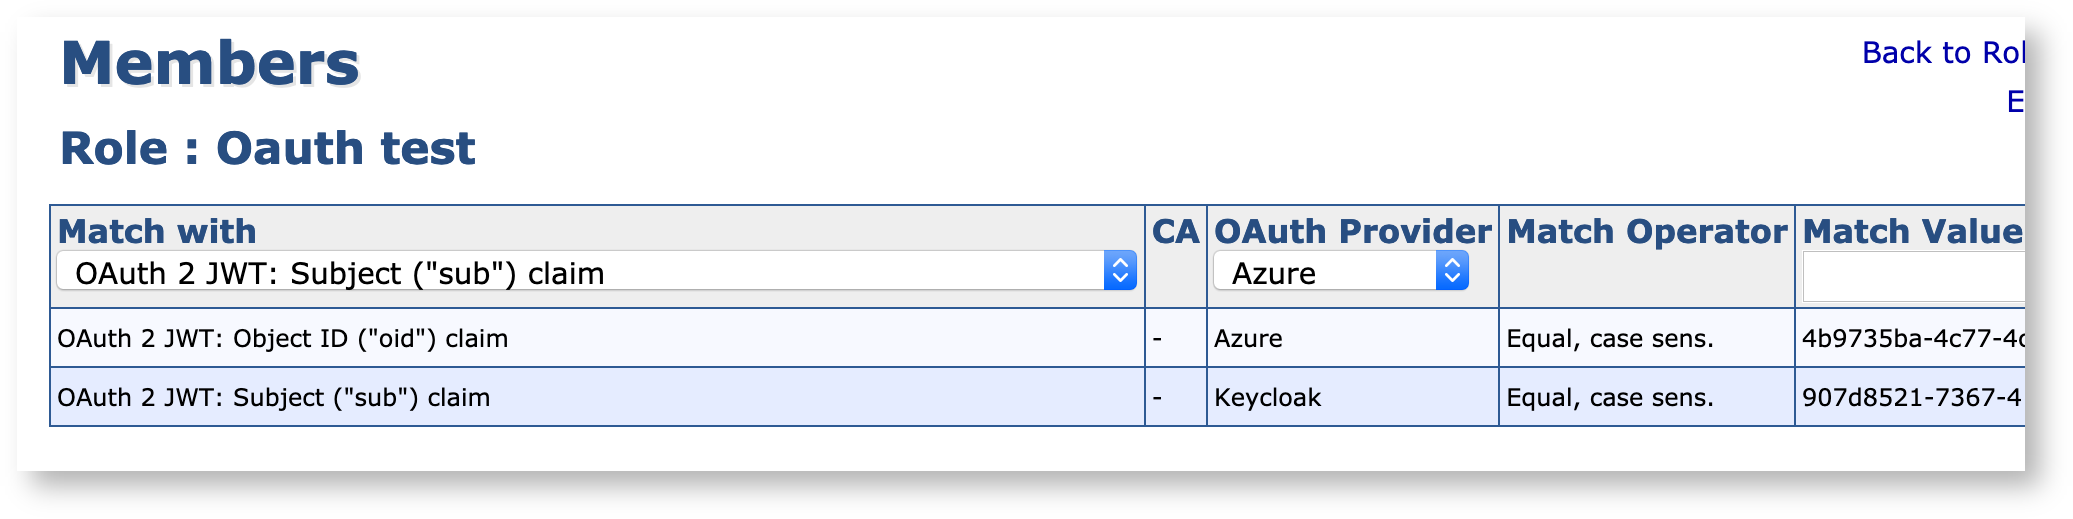
Add User in EJBCA
To add this user to the EJBCA role members list.
In EJBCA, under System Functions, click Role.
On the Admin role, click Members and specify one of the following:
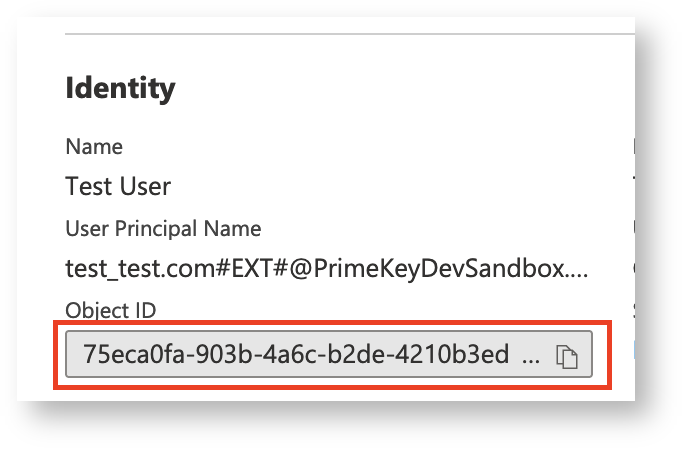
Object id ("oid") claim: As Match Value, use the Active Directory users Object ID, in this example: 75eca0fa-903b-4a6c-b2de-4210b3ed6d63 .
Issuer ("iss") claim: As Match Value, use https://login.microsoftonline.com/782cda56-d345-4861-b790-60a26a7a5130/v2.0 , where 782cda56-d345-4861-b790-60a26a7a5130 is the Directory (tenant) ID.
Select OAuth Provider.
Optionally, update the access rules for the user.