Creating a Root CA
This page describes the workflow for how to create an X509 Root CA.
For more general information on managing CAs, see Managing CAs and for conceptional information, see Certificate Authority Overview.
Note that the following provides a basic workflow for creating a Root CA and omits configurations and parameters that aren't obligatory to take into account.
Create Root CA
To create the root CA in the EJBCA CA UI, do the following:
Click Certification Authorities under CA Functions to open the Manage Certificate Authorities page.
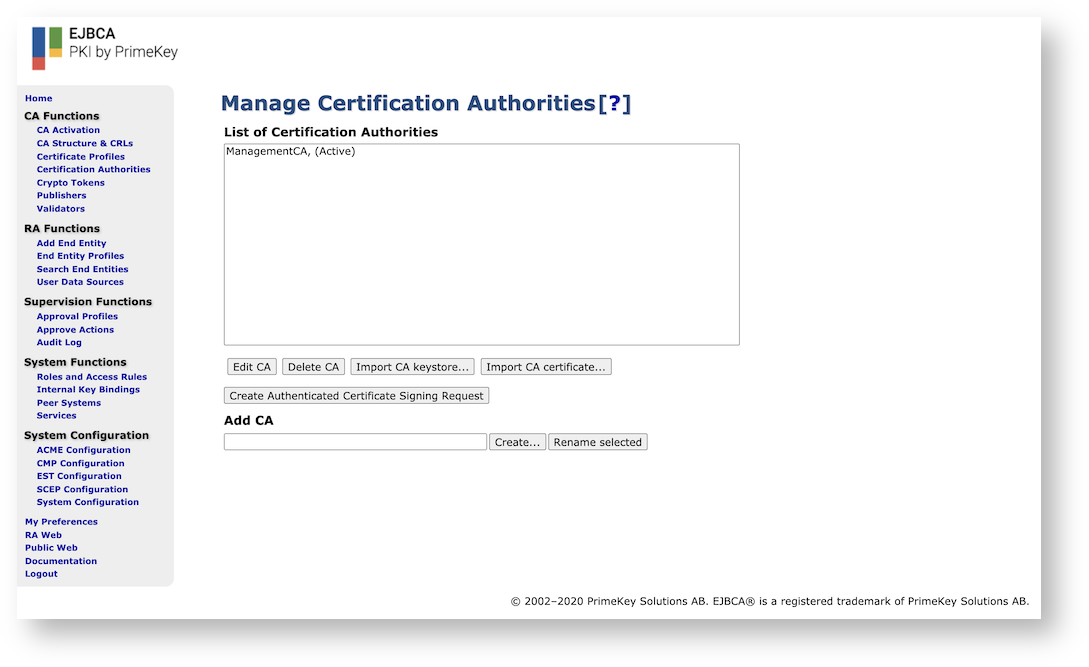
In the Add CA field, specify a name for the CA and click Create.

Next, on the Create CA page, set Subject DN, Issuer, and Certificate Profile:
Subject DN: Specify the subject DN for the CA.
Signed by: Select the signer of the CA's certificate, in this case Self Signed since this is the Root CA. Self Signed means that this CA has signed itself, i.e. making it a root.
Certificate Profile: Select certificate profile. The certificate profile can either be the ROOTCA template, or a derivative of it.
 Note that the certificate profile describes the root CA's own certificate, no the sub CA certificates it issues.
Specify the Validity of the CA's certificate. For a Root CA, it is recommended to set this validity pretty far in the future, for example 10 years.

Within the end of the validity period, you're going to have to renew your CA's certificate. Forgetting to do so will cause your entire PKI to become invalid.
Optionally configure Approvals/Dual Access Control.
If you want to have several trusted administrators sign off on the issuance of a new CA certificate, configure Approval Profiles in the Approval Settings section.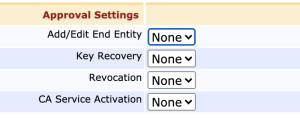
Specify any other desired values, then click Create at the bottom of the screen to finalize the CA.
Your Root CA is now online and listed on the Manage Certificate Authorities page.

Create Root CA Using Command Line Interface (CLI)
Alternatively, you can create the Root CAs using the Command Line Interface (CLI).
To create the Root CA, use the following CLI command:
$ bin/ejbca.sh ca initIssuing the command with the flag --help will print a full list of all flags and options. A typical example of using this command is as follows:
$ bin/ejbca.sh ca init TestRoot"C=SE,O=PrimeKey,CN=TestRoot"soft foo123 2048 RSA 365 --policy 2.5.29.32.0 SHA256WithRSA
This will create a root CA with the DN C=SE,O=PrimeKey,CN=TestRoot. The key length is 2048 bit (RSA) and the validity of the root certificate is 365 days. You need to quote the DN so it is treated as one argument. PKIX requires that a CRL always is available even if it is empty. When creating a new CA the CA certificate is stored and published (if any Publishers are configured), and the initial CRL is created and stored/published.