Setting up an Authentication Key Binding
The following covers how to set up an Authentication Key Binding. For more information about the concepts of Remote Authenticators, see Remote Authenticators Overview.
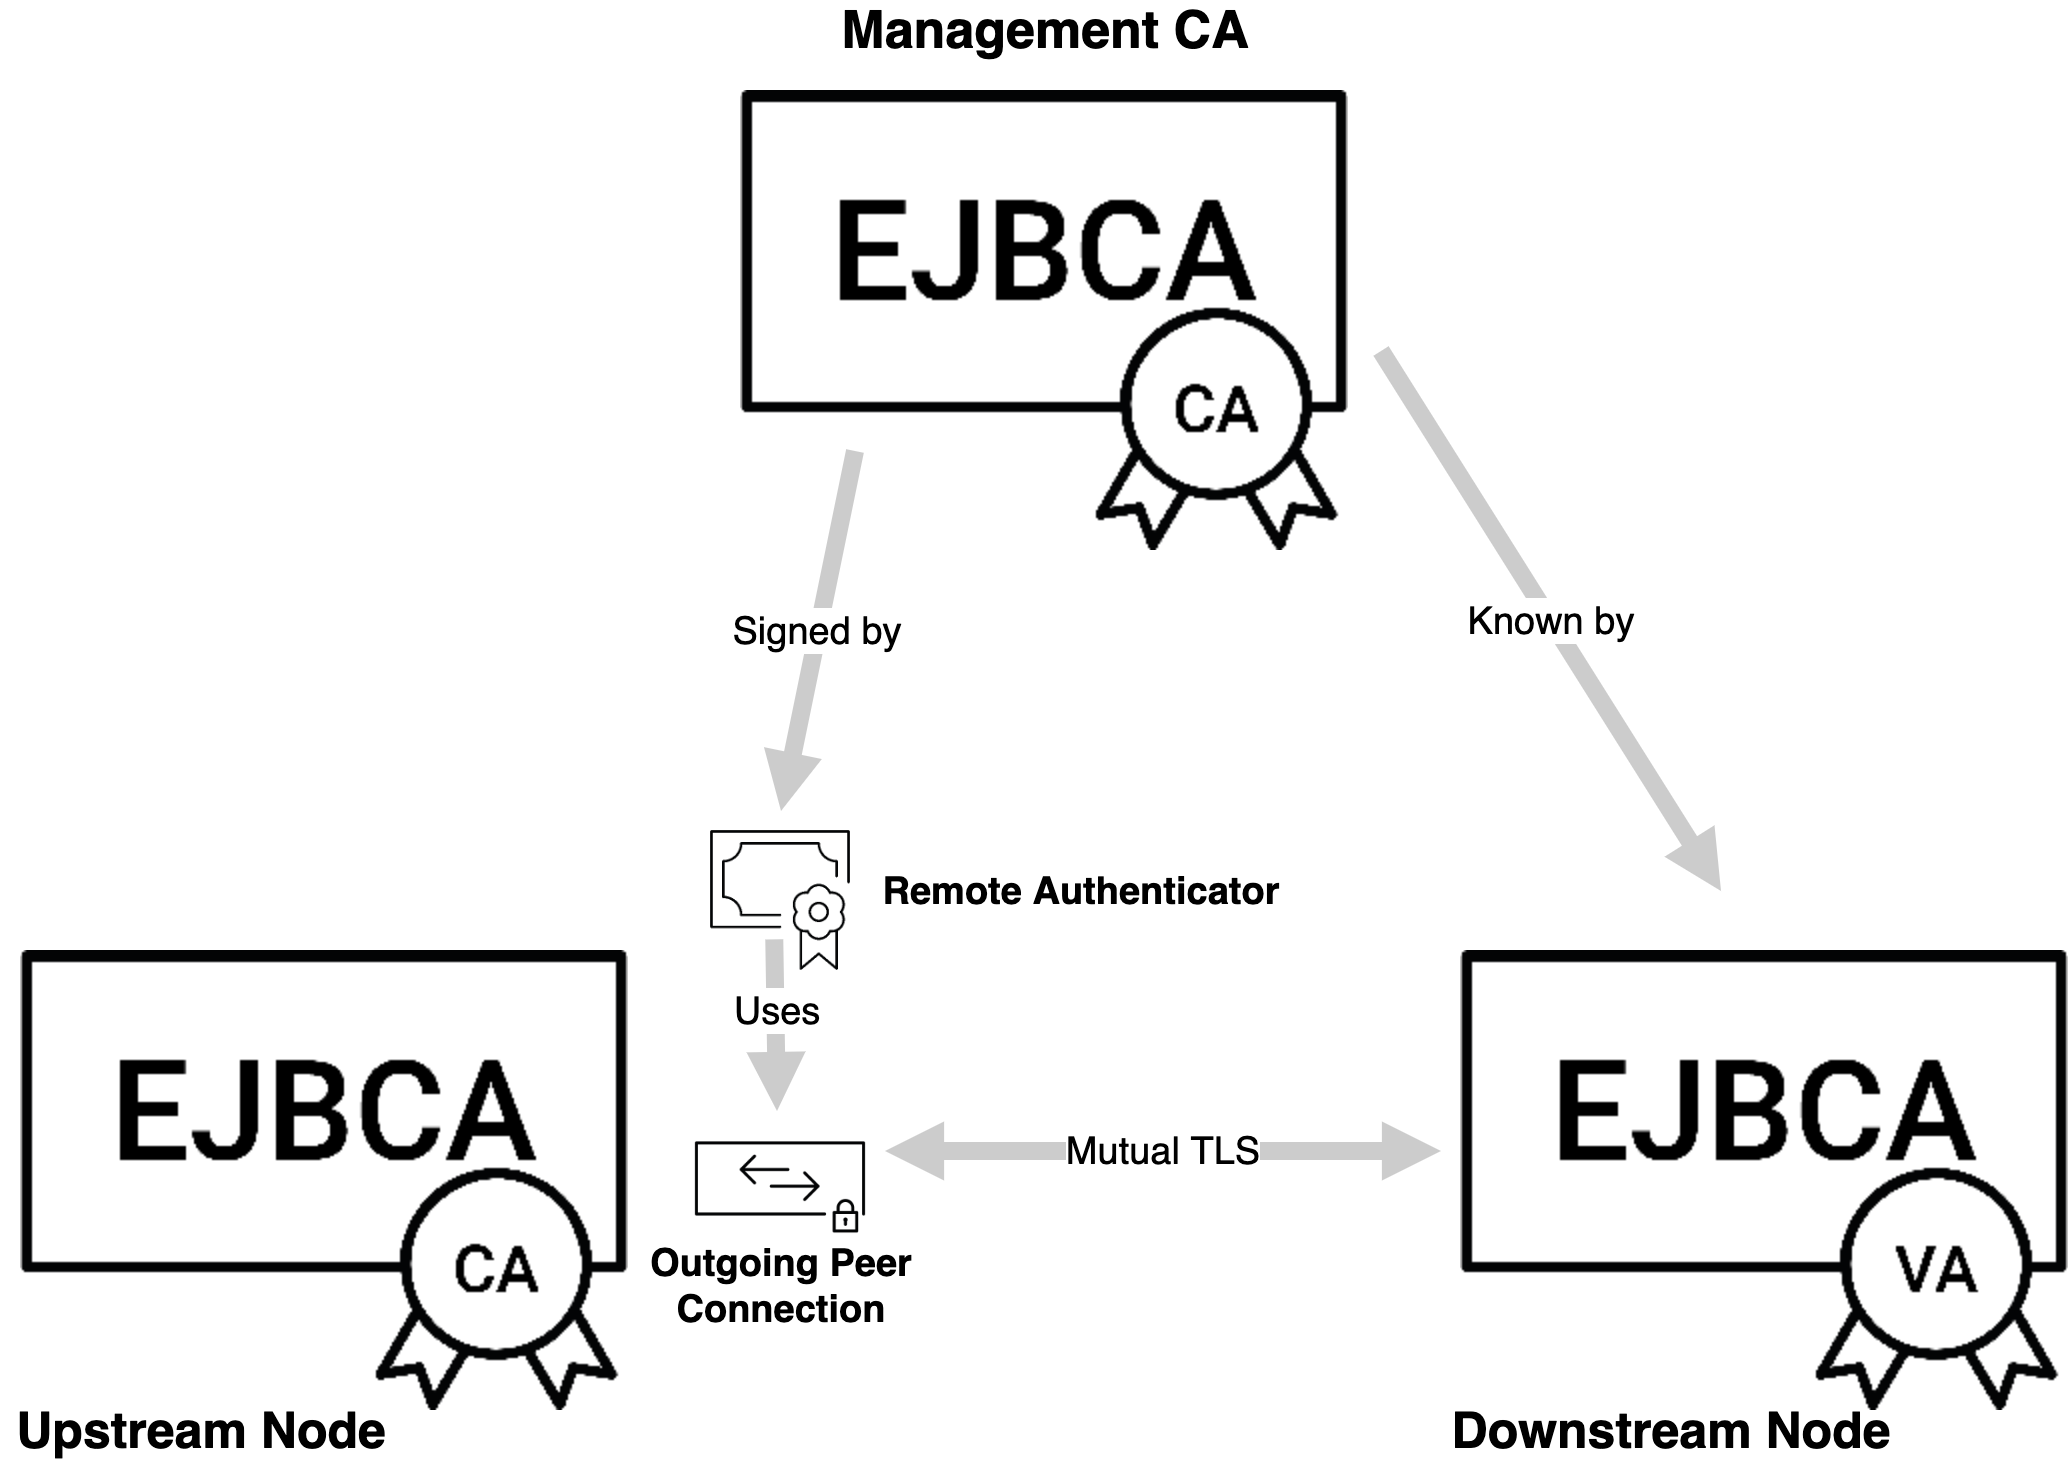
Remote Authenticators are used to establish mutual TLS, from the upstream node to the downstream node. Thus the Remote Authenticators needs to be established on the upstream node (commonly the CA) and the signing CA (commonly the Management CA) needs to be recognized on the downstream node (commonly a VA or RA).
Step 1 - Create the Remote Authenticator on the Upstream node
On the upstream node, select Remote Authenticators under System Functions.
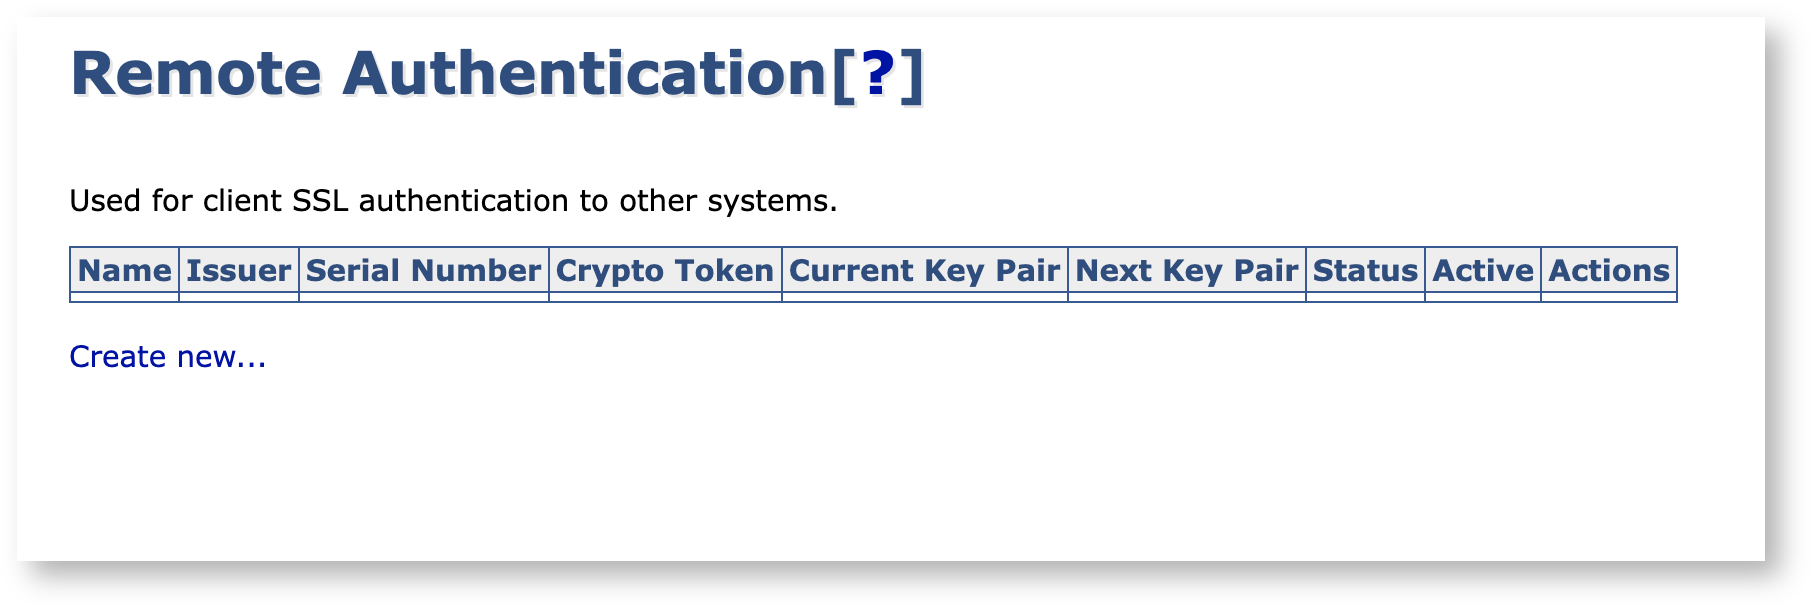
Click Create new to display the edit page.
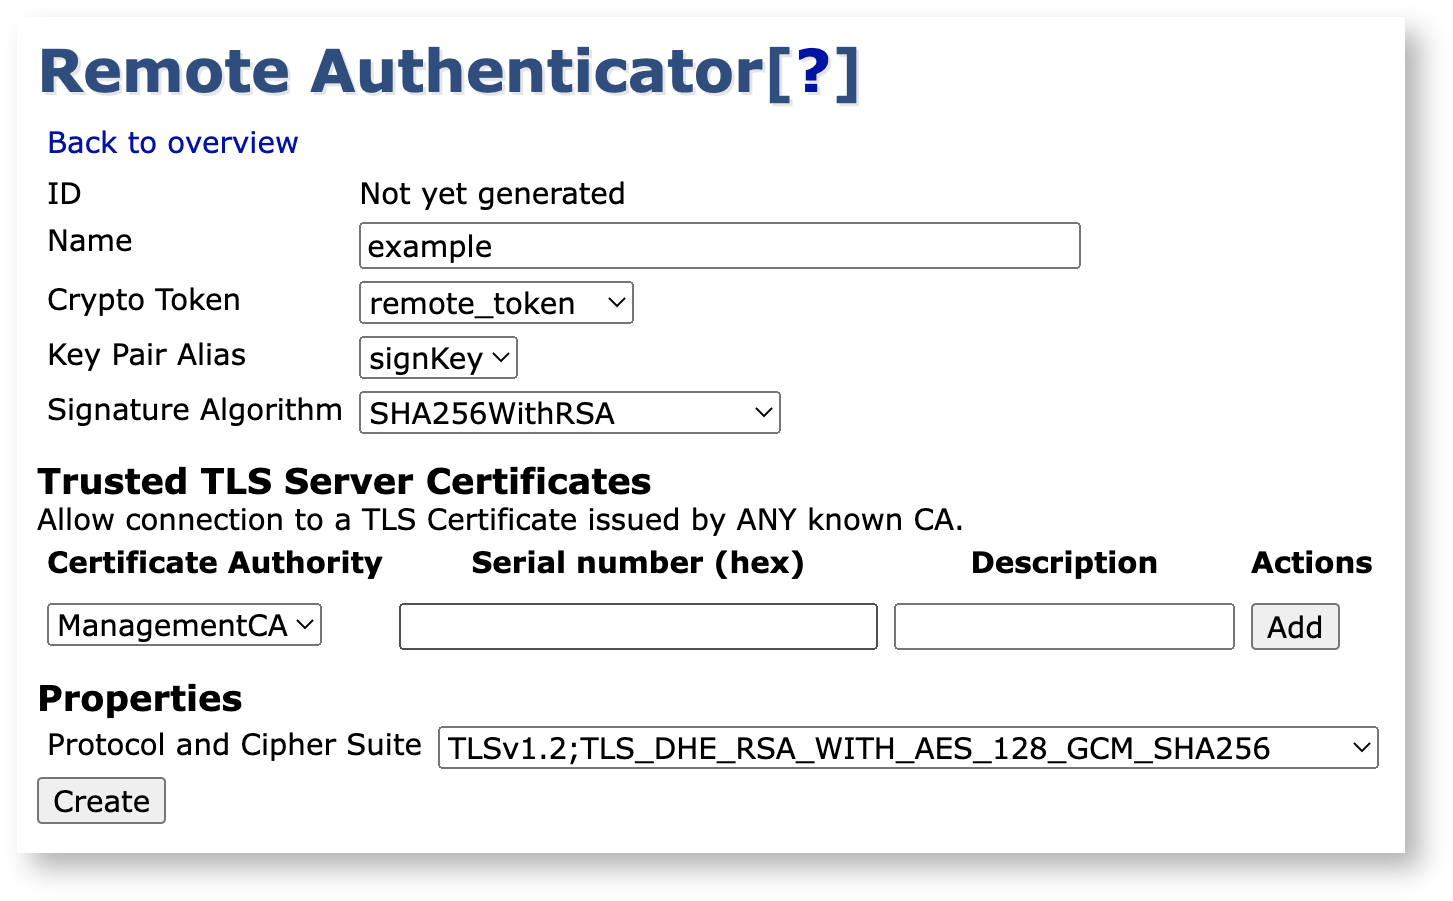
Specify values for the keybinding and optionally choose a Crypto Token to use for the TLS connection - it is strongly suggested that you use a dedicated crypto token for this purpose.
Click Create to generate the authenticator object.
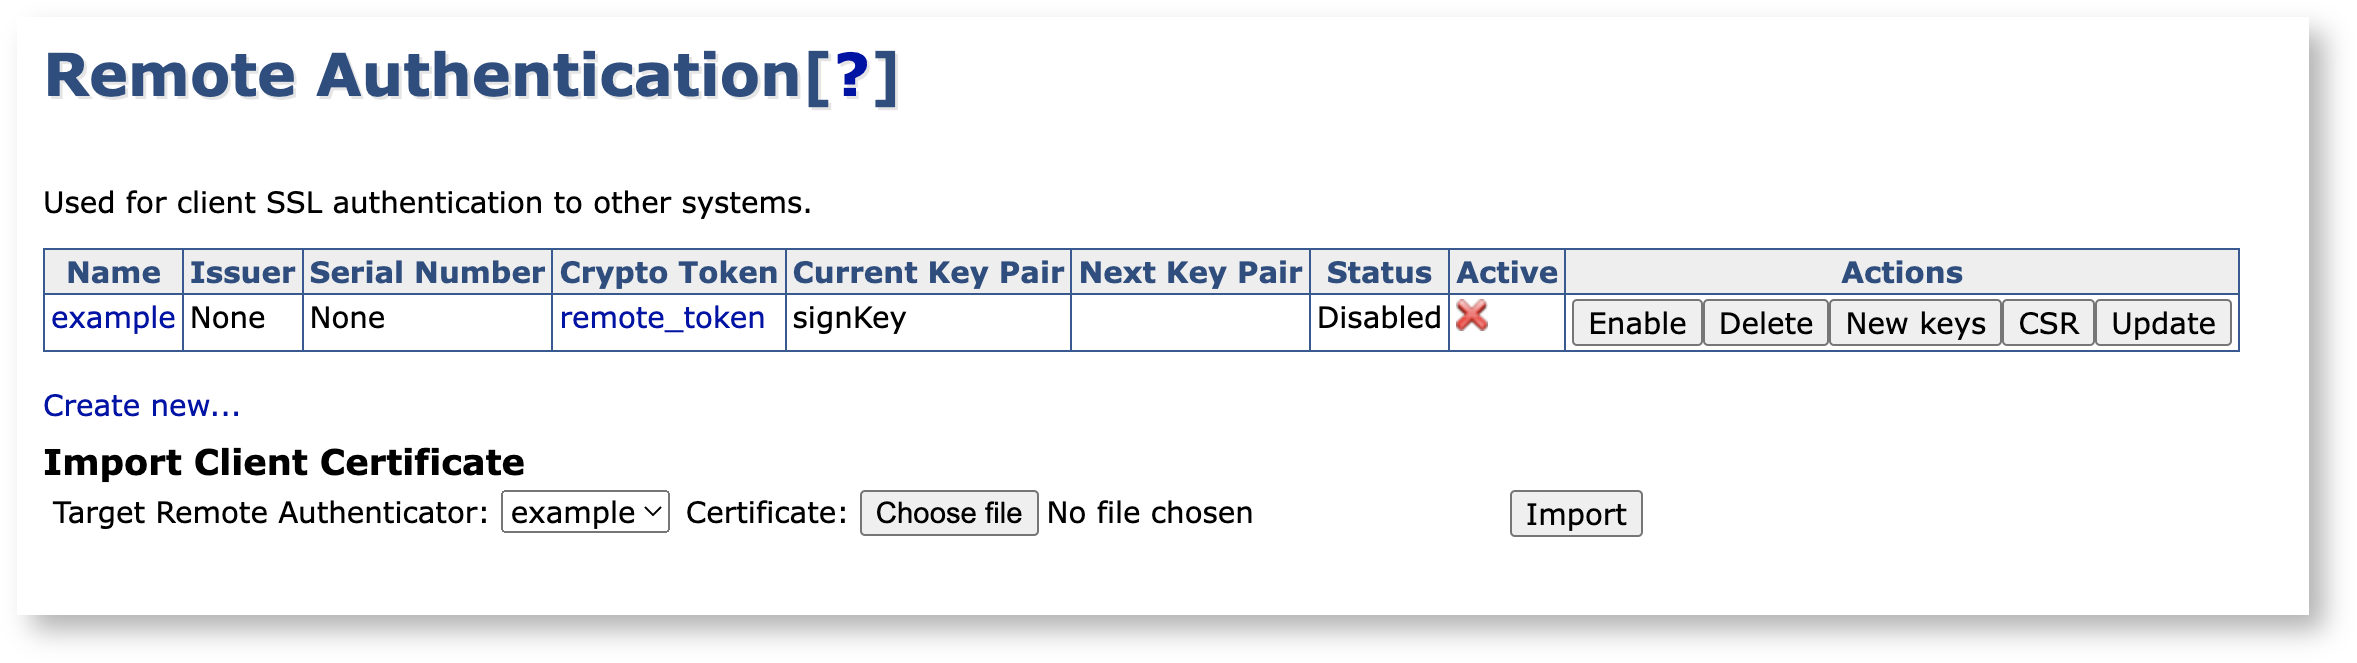
The created internal keybinding is disabled and not active, since the key pair has not yet been signed. Click CSR in the Actions column to download a PEM file containing the certificate signing request.
Step 2 - Signing the Key Pair
Returning to the Management CA, you're going to want to enroll using the RA UI, as the Remote Authenticator is treated by the Management CA as any other end entity.
This step assumes that an appropriate end entity profile and certificate profile have been generated on the instance containing the Management CA.
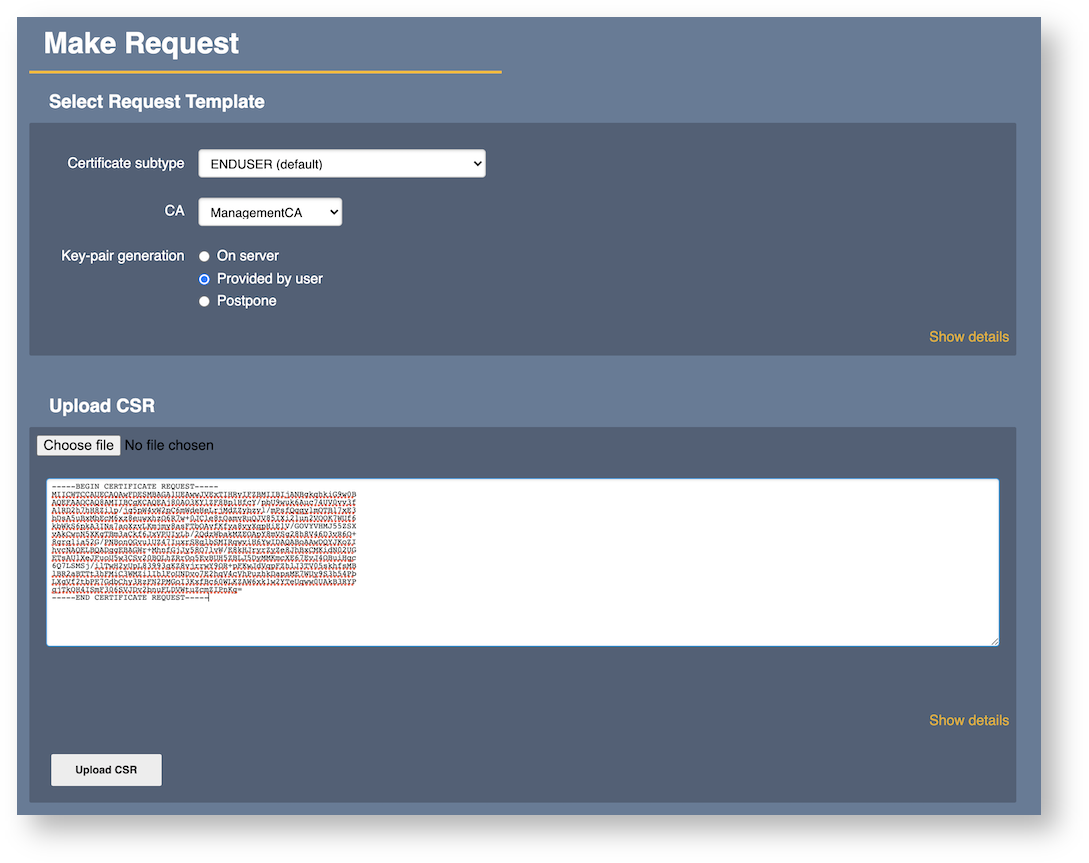
Click RA Web, and then select Enroll and Make new request.
Pick the appropriate profiles and CA's as needed, then paste or upload the CSR and click Upload CSR.
Finalize the enrollment by filling out any other fields required by the profiles, adding a username and verifying the information.
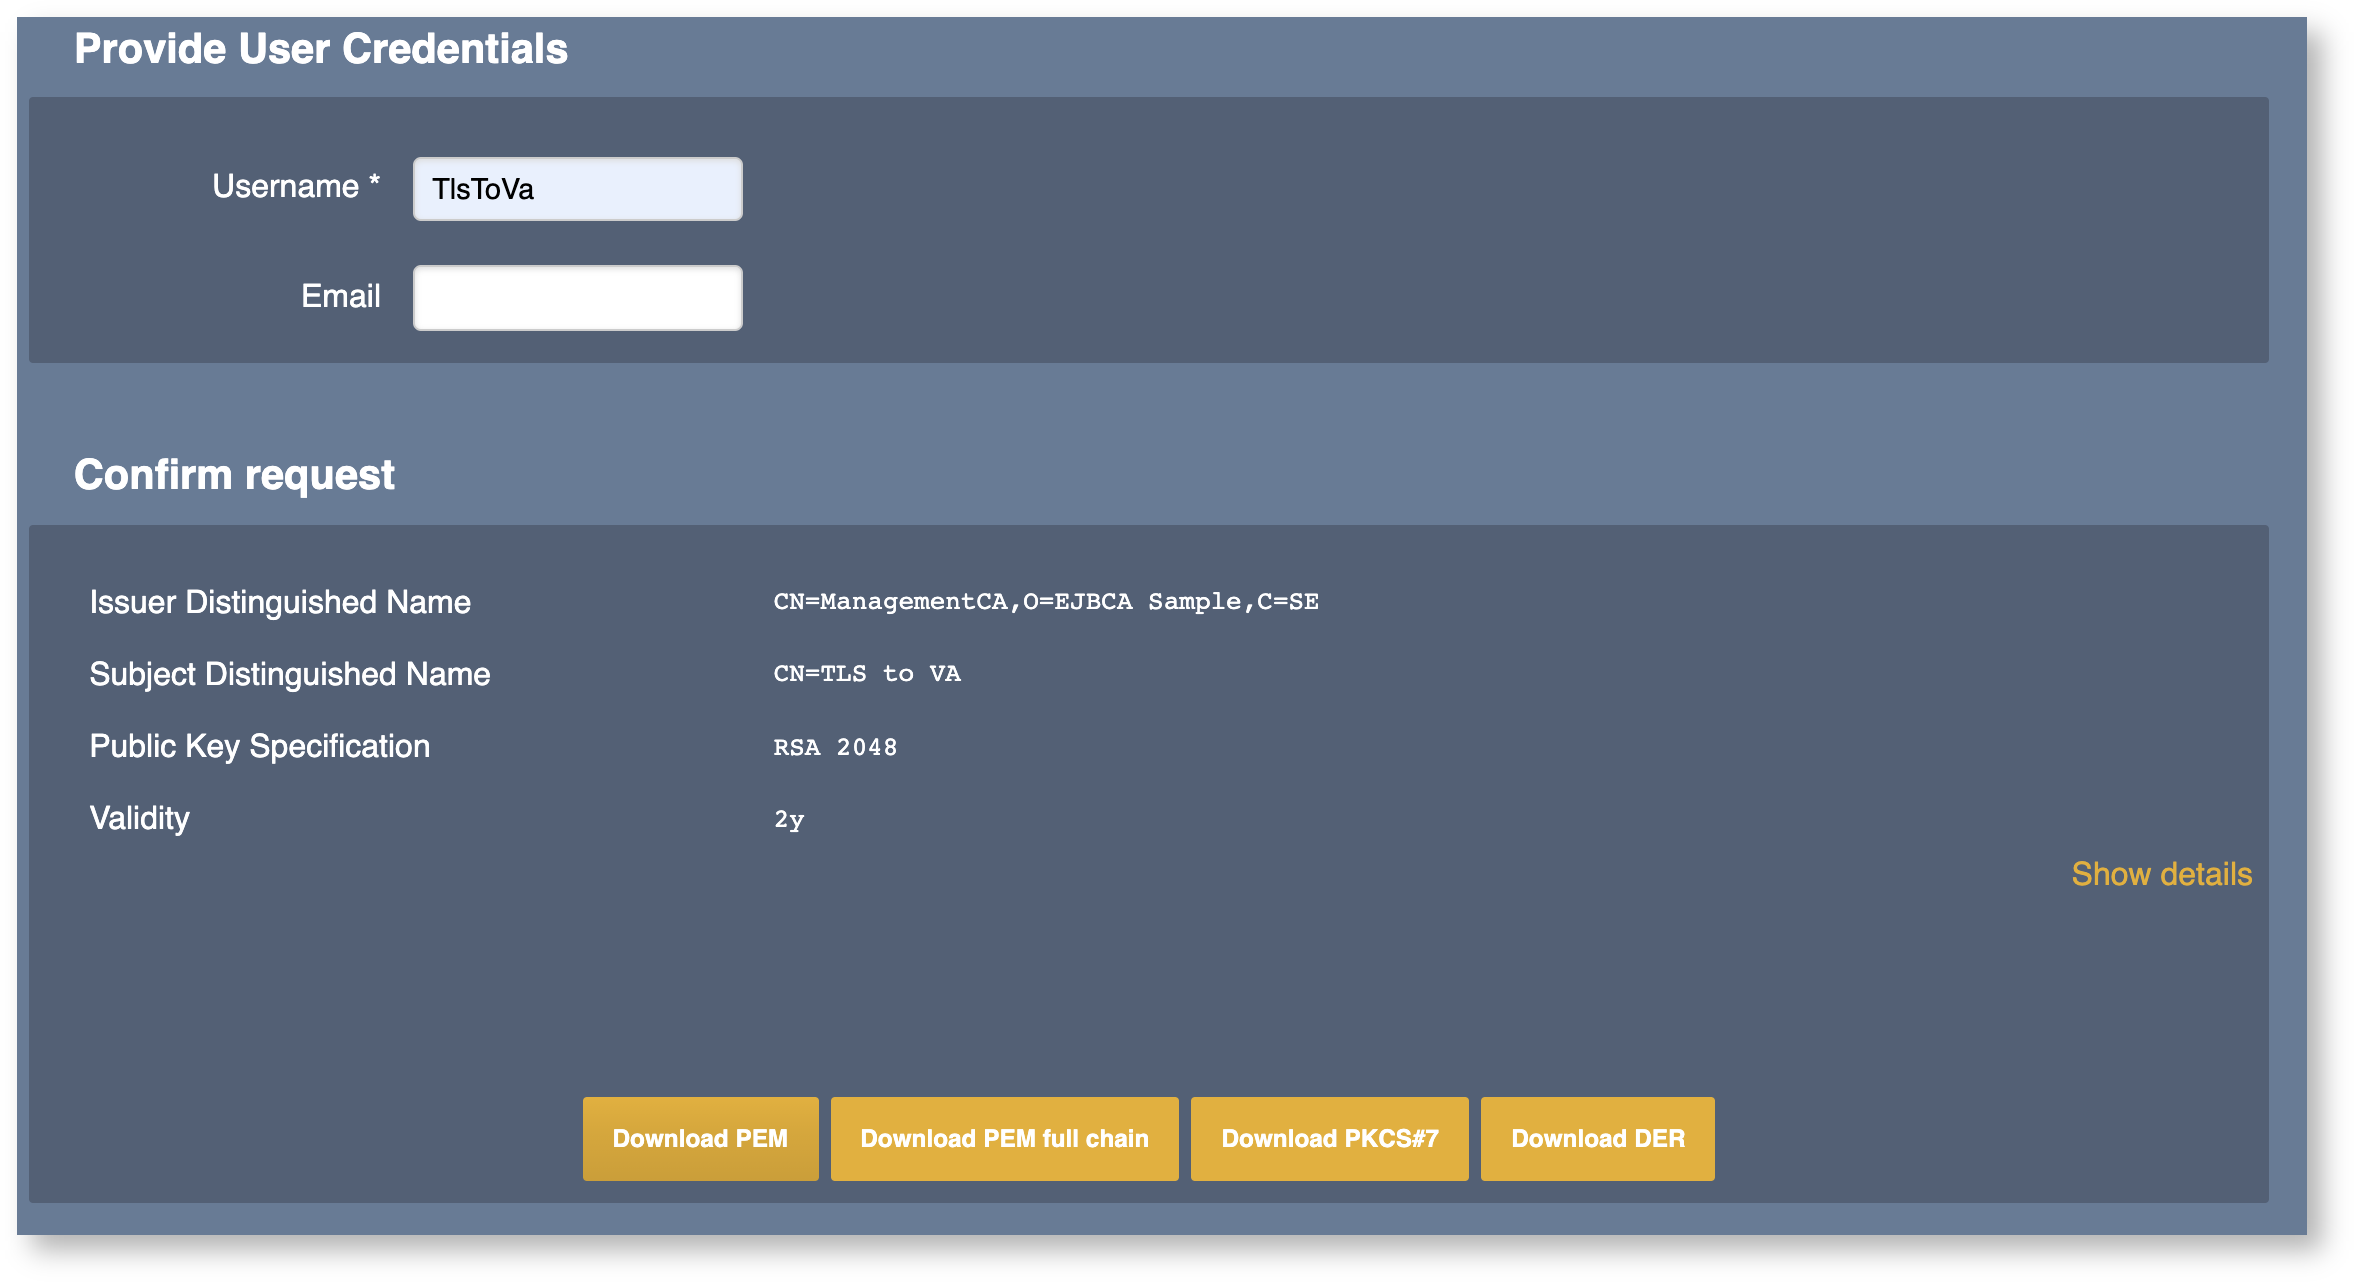
Click Download PEM (or your favorite certificate format) to download the generated certificate and save the file.
Step 3 - Activating the Authentication Key Binding
To import the certificate and enable the key binding:
Return to the Remote Authenticators page on the upstream instance (System Functions → Remote Authenticators).
Under Import Client Certificate, pick your targeted authenticator from the list and upload the certificate you just enrolled for.

Click Import to activate the key binding. Notice that the key binding now has a certificate associated with it.

As the last step, click Enable to activate the key binding.

Next Steps
You can now use this key binding to establish an outgoing peer connection to another EJBCA node, see Peer Systems Operations.